Python教程-如何用Python开发游戏

Python是一种非常多用途的编程语言,在各个领域都有广泛的应用,包括Web开发、机器学习、人工智能、GUI应用程序以及游戏开发。
Python提供了一个名为pygame的内置库,用于游戏开发。一旦我们了解了Python编程的基本概念,就可以使用pygame库创建具有引人注目的图形、适当动画和声音的游戏。
Pygame是一个跨平台的库,用于设计视频游戏。它包括计算机图形和声音库,为用户提供了标准的游戏体验。
它由Pete Shinners开发,用于替代PySDL。
Pygame的先决条件
要学习pygame,我们必须先了解Python编程语言。
安装Pygame
打开命令行终端,输入以下命令来安装pygame。
pip install pygame 我们也可以通过IDE来安装它。
简单的Pygame示例
以下是创建一个简单pygame窗口的示例。
import pygame

pygame.init()
screen = pygame.display.set_mode((400,500))
done = False

while not done:
    for event in pygame.event.get():
        if event.type == pygame.QUIT:
            done = True
    pygame.display.flip()
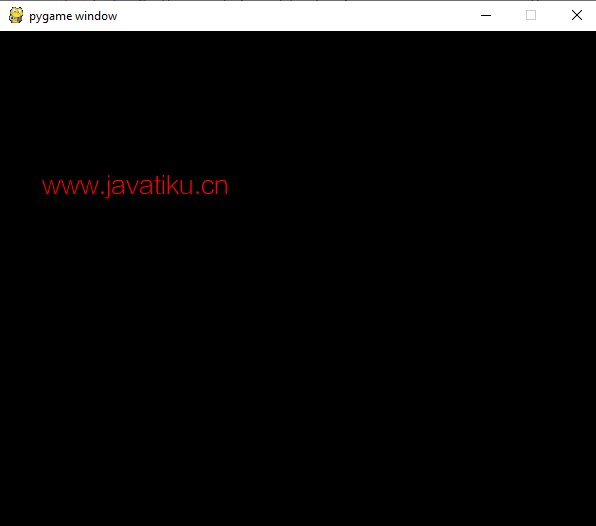
输出:

所有图形都将绘制在pygame窗口中。
让我们了解上述程序的基本语法。
import pygame - 这是一个允许我们使用pygame所有功能的模块。
pygame.init() - 用于初始化pygame的所有必需模块。
pygame.display.set_mode((width, height)) - 用于调整窗口大小。它将返回一个表面对象。表面对象用于执行图形操作。
pygame.event.get() - 清空事件队列。如果不调用它,窗口消息将开始堆积,操作系统将认为游戏无响应。
pygame.QUIT - 用于关闭窗口角落的关闭按钮时,用于解除事件。
pygame.display.flip() - 用于反映游戏的任何更新。如果进行任何更改,我们需要调用display.flip()函数。
我们可以在pygame表面上绘制任何形状,包括添加图像和吸引人的字体。Pygame提供了许多内置函数来在屏幕上绘制几何形状。这些形状是开发游戏的初始阶段。
让我们了解如何在屏幕上绘制形状的以下示例。
示例 -
import pygame
from math import pi
pygame.init()
# size variable is using for set screen size
size = [400, 300]
screen = pygame.display.set_mode(size)
pygame.display.set_caption("Example program to draw geometry")
# done variable is using as flag
done = False
clock = pygame.time.Clock()
while not done:
    # clock.tick() limits the while loop to a max of 10 times per second.
        clock.tick(10)

    for event in pygame.event.get():  # User did something
        if event.type == pygame.QUIT:  # If user clicked on close symbol
            done = True  # done variable that we are complete, so we exit this loop

    # All drawing code occurs after the for loop and but
    # inside the main while done==False loop.

    # Clear the default screen background and set the white screen background
    screen.fill((0, 0, 0))

    # Draw on the screen a green line which is 5 pixels wide.
    pygame.draw.line(screen, (0, 255, 0), [0, 0], [50, 30], 5)
    # Draw on the screen a green line which is 5 pixels wide.
    pygame.draw.lines(screen, (0, 0, 0), False, [[0, 80], [50, 90], [200, 80], [220, 30]], 5)

    # Draw a rectangle outline
    pygame.draw.rect(screen, (0, 0, 0), [75, 10, 50, 20], 2)

    # Draw a solid rectangle
    pygame.draw.rect(screen, (0, 0, 0), [150, 10, 50, 20])

    # This draw an ellipse outline, using a rectangle as the outside boundaries
    pygame.draw.ellipse(screen, (255, 0, 0), [225, 10, 50, 20], 2)

    # This draw a solid ellipse, using a rectangle as the outside boundaries
    pygame.draw.ellipse(screen, (255, 0, 0), [300, 10, 50, 20])

    # Draw a triangle using the polygon function
    pygame.draw.polygon(screen, (0, 0, 0), [[100, 100], [0, 200], [200, 200]], 5)

    # This draw a circle
    pygame.draw.circle(screen, (0, 0, 255), [60, 250], 40)

    # This draw an arc
    pygame.draw.arc(screen, (0, 0, 0), [210, 75, 150, 125], 0, pi / 2, 2)

    # This function must write after all the other drawing commands.
    pygame.display.flip()

# Quite the execution when clicking on close
pygame.quit()
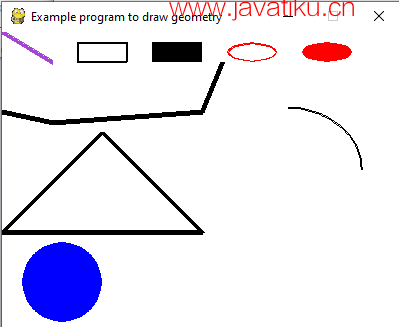
输出:

解释 -
在上面的示例中,我们绘制了不同的形状,如三角形、直线、矩形、椭圆、圆、弧、实心圆和椭圆。我们根据形状使用了pygame.draw函数,并提供了合适的参数。
示例 - 使用Pygame开发贪吃蛇游戏
程序 -
# Snake Tutorial Using Pygame

import math
import random
import pygame
import tkinter as tk
from tkinter import messagebox


class cube(object):
    rows = 20
    w = 500

    def __init__(self, start, dirnx=1, dirny=0, color=(255, 0, 0)):
        self.pos = start
        self.dirnx = 1
        self.dirny = 0
        self.color = color

    def move(self, dirnx, dirny):
        self.dirnx = dirnx
        self.dirny = dirny
        self.pos = (self.pos[0] + self.dirnx, self.pos[1] + self.dirny)

    def draw(self, surface, eyes=False):
        dis = self.w // self.rows
        i = self.pos[0]
        j = self.pos[1]

        pygame.draw.rect(surface, self.color, (i * dis + 1, j * dis + 1, dis - 2, dis - 2))
        if eyes:
            centre = dis // 2
            radius = 3
            circleMiddle = (i * dis + centre - radius, j * dis + 8)
            circleMiddle2 = (i * dis + dis - radius * 2, j * dis + 8)
            pygame.draw.circle(surface, (0, 0, 0), circleMiddle, radius)
            pygame.draw.circle(surface, (0, 0, 0), circleMiddle2, radius)

# This class is defined for snake design and its movement
class snake(object):
    body = []
    turns = {}

    def __init__(self, color, pos):
        self.color = color
        self.head = cube(pos)
        self.body.append(self.head)
        self.dirnx = 0
        self.dirny = 1

    def move(self):
        for event in pygame.event.get():
            if event.type == pygame.QUIT:
                pygame.quit()

            keys = pygame.key.get_pressed()
            # It will manage the keys movement for the snake
            for key in keys:
                if keys[pygame.K_LEFT]:
                    self.dirnx = -1
                    self.dirny = 0
                    self.turns[self.head.pos[:]] = [self.dirnx, self.dirny]

                elif keys[pygame.K_RIGHT]:
                    self.dirnx = 1
                    self.dirny = 0
                    self.turns[self.head.pos[:]] = [self.dirnx, self.dirny]

                elif keys[pygame.K_UP]:
                    self.dirnx = 0
                    self.dirny = -1
                    self.turns[self.head.pos[:]] = [self.dirnx, self.dirny]

                elif keys[pygame.K_DOWN]:
                    self.dirnx = 0
                    self.dirny = 1
                    self.turns[self.head.pos[:]] = [self.dirnx, self.dirny]
        # Snake when hit the boundary wall
        for i, c in enumerate(self.body):
            p = c.pos[:]
            if p in self.turns:
                turn = self.turns[p]
                c.move(turn[0], turn[1])
                if i == len(self.body) - 1:
                    self.turns.pop(p)
            else:
                if c.dirnx == -1 and c.pos[0] <= 0:
                    c.pos = (c.rows - 1, c.pos[1])
                elif c.dirnx == 1 and c.pos[0] >= c.rows - 1:
                    c.pos = (0, c.pos[1])
                elif c.dirny == 1 and c.pos[1] >= c.rows - 1:
                    c.pos = (c.pos[0], 0)
                elif c.dirny == -1 and c.pos[1] <= 0:
                    c.pos = (c.pos[0], c.rows - 1)
                else:
                    c.move(c.dirnx, c.dirny)

    def reset(self, pos):
        self.head = cube(pos)
        self.body = []
        self.body.append(self.head)
        self.turns = {}
        self.dirnx = 0
        self.dirny = 1
# It will add the new cube in snake tail after every successful score
    def addCube(self):
        tail = self.body[-1]
        dx, dy = tail.dirnx, tail.dirny

        if dx == 1 and dy == 0:
            self.body.append(cube((tail.pos[0] - 1, tail.pos[1])))
        elif dx == -1 and dy == 0:
            self.body.append(cube((tail.pos[0] + 1, tail.pos[1])))
        elif dx == 0 and dy == 1:
            self.body.append(cube((tail.pos[0], tail.pos[1] - 1)))
        elif dx == 0 and dy == -1:
            self.body.append(cube((tail.pos[0], tail.pos[1] + 1)))

        self.body[-1].dirnx = dx
        self.body[-1].dirny = dy

    def draw(self, surface):
        for i, c in enumerate(self.body):
            if i == 0:
                c.draw(surface, True)
            else:
                c.draw(surface)


def drawGrid(w, rows, surface):
    sizeBtwn = w // rows

    x = 0
    y = 0
    for l in range(rows):
        x = x + sizeBtwn
        y = y + sizeBtwn
        # draw grid line
        pygame.draw.line(surface, (255, 255, 255), (x, 0), (x, w))
        pygame.draw.line(surface, (255, 255, 255), (0, y), (w, y))

# This class define for draw game surface
def redrawWindow(surface):
    global rows, width, s, snack
    # This is used to grid surface
    surface.fill((0, 0, 0))
    s.draw(surface)
    snack.draw(surface)
    drawGrid(width, rows, surface)
    pygame.display.update()


def randomSnack(rows, item):
    positions = item.body

    while True:
        x = random.randrange(rows)
        y = random.randrange(rows)
        if len(list(filter(lambda z: z.pos == (x, y), positions))) > 0:
            continue
        else:
            break

    return (x, y)

# Using Tkinter function to display message
def message_box(subject, content):
    root = tk.Tk()
    root.attributes("-topmost", True)
    root.withdraw()
    messagebox.showinfo(subject, content)
    try:
        root.destroy()
    except:
        pass

# main() function
def main():
    global width, rows, s, snack
    width = 500
    rows = 20
    win = pygame.display.set_mode((width, width))
    s = snake((255, 0, 0), (10, 10))
    snack = cube(randomSnack(rows, s), color=(0, 255, 0))
    flag = True

    clock = pygame.time.Clock()

    while flag:
        pygame.time.delay(50)
        clock.tick(10)
        s.move()
        if s.body[0].pos == snack.pos:
            s.addCube()
            snack = cube(randomSnack(rows, s), color=(0, 255, 0))

        for x in range(len(s.body)):
            if s.body[x].pos in list(map(lambda z: z.pos, s.body[x + 1:])):
                print('Score: \n', len(s.body))
                message_box('You Lost!\n', 'Play again...\n')
                s.reset((10, 10))
                break

        redrawWindow(win)

    pass


main()
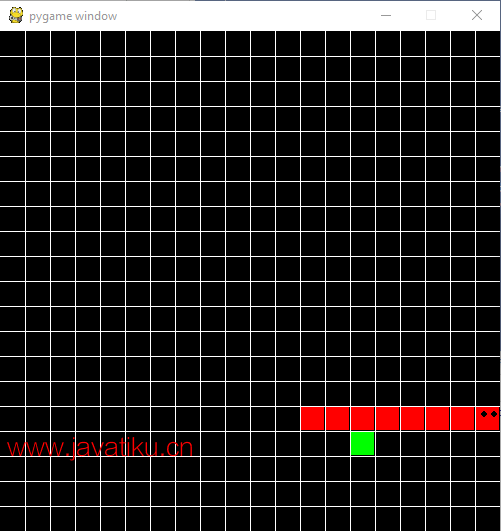
输出:

如果蛇碰到自己,游戏将终止并显示以下消息。
点击“确定”按钮可以再次玩游戏。我们可以在Pycharm终端中看到分数(我们使用了Pycharm IDE;你可以使用任何Python IDE)。

复制上面的代码并将其粘贴到你的IDE中,然后尽情玩耍。


