Spring教程-Spring MVC Model 接口

Spring MVC Model 接口
在 Spring MVC 中,模型是一个容器,用于存储应用程序的数据。在这里,数据可以是任何形式,例如对象、字符串、来自数据库的信息等。
需要在应用程序的控制器部分中放置 Model 接口。HttpServletRequest 对象读取用户提供的信息并将其传递给 Model 接口。然后,视图页面可以轻松地从模型部分访问数据。
Model 接口的方法
| 方法 | 描述 |
|---|---|
| Model addAllAttributes(Collection<?> arg) | 将提供的 Collection 中的所有属性添加到此 Map 中。 |
| Model addAllAttributes(Map<String,?> arg) | 将提供的 Map 中的所有属性添加到此 Map 中。 |
| Model addAllAttribute(Object arg) | 使用生成的名称将提供的属性添加到此 Map 中。 |
| Model addAllAttribute(String arg0, Object arg1) | 使用提供的名称将属性绑定到此 Map 中。 |
| Map<String, Object> asMap() | 将当前的模型属性集合作为 Map 返回。 |
| Model mergeAttributes(Map< String,?> arg) | 将提供的 Map 中的所有属性添加到此 Map 中,现有的具有相同名称的对象优先。 |
| boolean containsAttribute(String arg) | 指示此模型是否包含给定名称的属性。 |
Spring MVC Model 示例
我们创建一个登录页面,包含用户名和密码。在这里,我们使用特定值验证密码。
Add dependencies to pom.xml
    <!-- https://mvnrepository.com/artifact/org.springframework/spring-webmvc -->
<dependency>
    <groupId>org.springframework</groupId>
    <artifactId>spring-webmvc</artifactId>
    <version>5.1.1.RELEASE</version>
</dependency>

<!-- https://mvnrepository.com/artifact/javax.servlet/javax.servlet-api -->
<dependency>
    <groupId>javax.servlet</groupId>
    <artifactId>servlet-api</artifactId>
    <version>3.0-alpha-1</version>
</dependency>
2.创建请求页面
在这里,我们创建登录页面来接收用户的用户名和密码。
index.jsp
<html>
<body>
<form action="hello">
UserName : <input type="text" name="name"/> <br><br>
Password : <input type="text" name="pass"/> <br><br>
<input type="submit" name="submit">
</form>
</body>
</html>
3.创建控制器类
在控制器类中:
1.使用 HttpServletRequest 用于读取用户提供的 HTML 表单数据。
2.Model 包含请求数据,并将其提供给视图页面。
HelloController.java
package cn.javatiku;
import javax.servlet.http.HttpServletRequest;
import org.springframework.stereotype.Controller;
import org.springframework.ui.Model;
import org.springframework.web.bind.annotation.RequestMapping;

@Controller
public class HelloController {

    @RequestMapping("/hello")
    public String display(HttpServletRequest req,Model m)
    {
        //read the provided form data
        String name=req.getParameter("name");
        String pass=req.getParameter("pass");
        if(pass.equals("admin"))
        {
            String msg="Hello "+ name;
            //add a message to the model
            m.addAttribute("message", msg);
            return "viewpage";
        }
        else
        {
            String msg="Sorry "+ name+". You entered an incorrect password";
            m.addAttribute("message", msg);
            return "errorpage";
        }
    }
}
4.在 web.xml 文件中添加控制器的入口配置:
web.xml
<?xml version="1.0" encoding="UTF-8"?>
<web-app xmlns:xsi="http://www.w3.org/2001/XMLSchema-instance" xmlns="http://java.sun.com/xml/ns/javaee" xsi:schemaLocation="http://java.sun.com/xml/ns/javaee http://java.sun.com/xml/ns/javaee/web-app_3_0.xsd" id="WebApp_ID" version="3.0">
  <display-name>SpringMVC</display-name>
   <servlet>
    <servlet-name>spring</servlet-name>
    <servlet-class>org.springframework.web.servlet.DispatcherServlet</servlet-class>
    <load-on-startup>1</load-on-startup>
</servlet>
<servlet-mapping>
    <servlet-name>spring</servlet-name>
    <url-pattern>/</url-pattern>
</servlet-mapping>
</web-app>
5.在 XML 文件中定义 Bean:
spring-servlet.xml
<?xml version="1.0" encoding="UTF-8"?>
<beans xmlns="http://www.springframework.org/schema/beans"
    xmlns:xsi="http://www.w3.org/2001/XMLSchema-instance"
    xmlns:context="http://www.springframework.org/schema/context"
    xmlns:mvc="http://www.springframework.org/schema/mvc"
    xsi:schemaLocation="
        http://www.springframework.org/schema/beans
        http://www.springframework.org/schema/beans/spring-beans.xsd
        http://www.springframework.org/schema/context
        http://www.springframework.org/schema/context/spring-context.xsd
        http://www.springframework.org/schema/mvc
        http://www.springframework.org/schema/mvc/spring-mvc.xsd">

    <!-- Provide support for component scanning -->
    <context:component-scan base-package="cn.javatiku" />

    <!--Provide support for conversion, formatting and validation -->
    <mvc:annotation-driven/>
<bean id="viewResolver" class="org.springframework.web.servlet.view.InternalResourceViewResolver">
        <property name="prefix" value="/WEB-INF/jsp/"></property>
        <property name="suffix" value=".jsp"></property>
     </bean>
</beans>
6.创建其他视图组件:
为了运行这个示例,以下的视图组件必须位于 WEB-INF/jsp 目录下。
viewpage.jsp
<html>
<body>
${message}
</body>
</html>
errorpage.jsp
<html>
<body>
${message}
<br><br>
<jsp:include page="/index.jsp"></jsp:include>
</body>
</html> 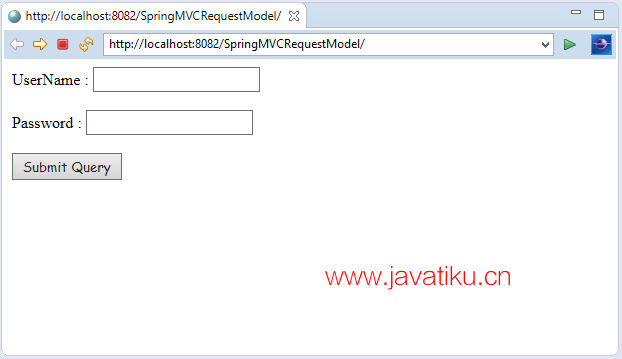
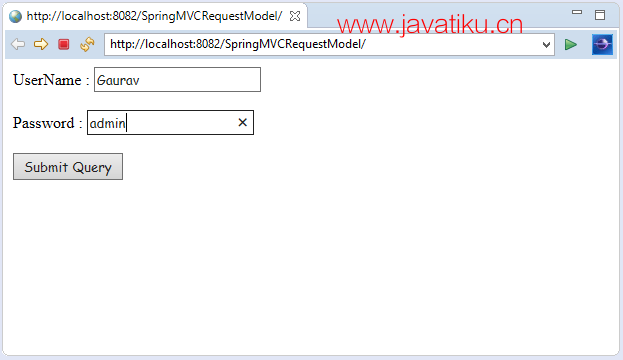
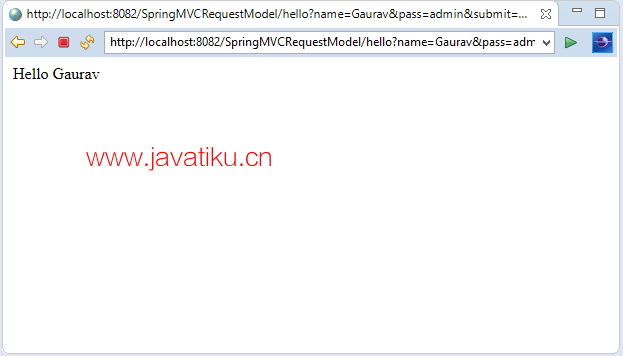
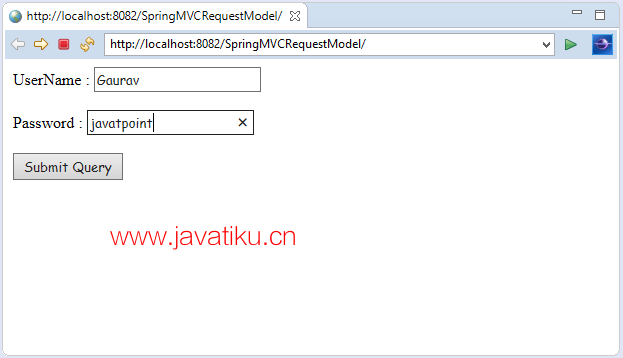
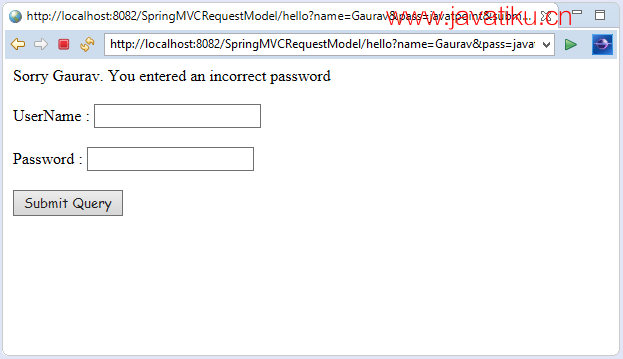
输出:根据密码的正确与否,您将在不同的视图页面中看到不同的消息。


