PyTorch 教程-针对风格转换的优化过程

我们现在已经有了三张图片,现在可以执行我们的优化过程。为了执行优化过程,我们需要按照以下步骤进行操作:
步骤1:
在第一步中,我们定义了一些基本参数,这些参数帮助我们可视化训练过程并简化训练过程。第一个参数在每次迭代时显示目标图像,以便我们可以检查优化过程。我们使用Adam优化器定义了目标图像,并设置了学习率。最后但同样重要的是,我们定义了训练过程应该进行的优化步骤数。
由于训练过程可能需要很长时间才能完成,因此我们需要在结果和时间效率之间保持平衡。因此,我们将定义我们的步骤,并在我们的情况下将步骤限制为2100。
show_every=300
optimizer=optim.Adam([target],lr=0.003)
steps=2100
步骤2:
现在,我们实现了一些用于数据可视化的代码行。我们定义了一个图像数组,该数组将在训练过程中存储目标图像。在训练过程结束后,我们可以通过这些图像创建一个视频,以了解样式和内容图像如何结合优化目标图像。我们将解开目标图像的形状。
height,width,channels=im_convert(target).shape
image_array=np.empty(shape=(300,height,width,channels))
我们将定义一个捕获帧,它帮助我们每次捕获一帧。最后,我们将定义一个计数器变量,它将跟踪数组索引。
capture_frame=steps/300
counter=0
优化迭代过程
#Defining a loop statement from 1 to steps+1
for ii in range(1,steps+1): #To ensure that our loop runs for the defined number of steps
  # Extracting feature for our current target image
  target_features=get_features(target,vgg)
  #Calculating the content loss for the iteration
  content_loss=torch.mean((target_features['conv4_2']content_features['conv4_2'])**2)
  #Initializing style loss
  style_loss=0
 #The style loss is the result of a combine loss from five different layer within our model.
 #For this reason we iterate through the five style features to get the error at each layer.
  for layer in style_weights:
    #Collecting the target feature for the specific layer from the target feature variable
    target_feature=target_features[layer]
    #Applying gram matrix function to our target feature
    target_gram=gram_matrix(target_feature)
    #Getting style_gram value for our style image from the style grams variable
    style_gram=style_grams[layer]
    #Calculating the layer style loss as content loss
    layer_style_loss=style_weights[layer]*torch.mean((target_gram-style_gram)**2)
    #Obtaining feature dimensions
    _,d,h,w=target_feature.shape
    #Calculating total style loss
    style_loss += layer_style_loss/(d*h*w)
  #Calculating total loss
  total_loss=content_weight*content_loss+style_weight*style_loss
  #Using the optimizer to update parameters within our target image
  optimizer.zero_grad()
  total_loss.backward()
  optimizer.step()
  #Process  for visualization throughout the training process
  #Comparing the iteration variable with our show every
  if ii % show_every==0:
    #Printing total loss
    print('Total loss:',total_loss.item())
    #Printing the iteration
    print('Iteration',ii)
    #Printting the target images
    plt.imshow(im_convert(target))
    #Removing the axis on the image
    plt.axis('off')
    # Showing image
    plt.show()
   #Comparing the iteration variable with our capture frame variable
   if ii%capture_frame==0: # Capturing a frame at every 700 iteration
     #Storing the target image into the image_array
     image_array[counter]=im_convert(target)
     # Increment in the counter variable
     counter=counter+1
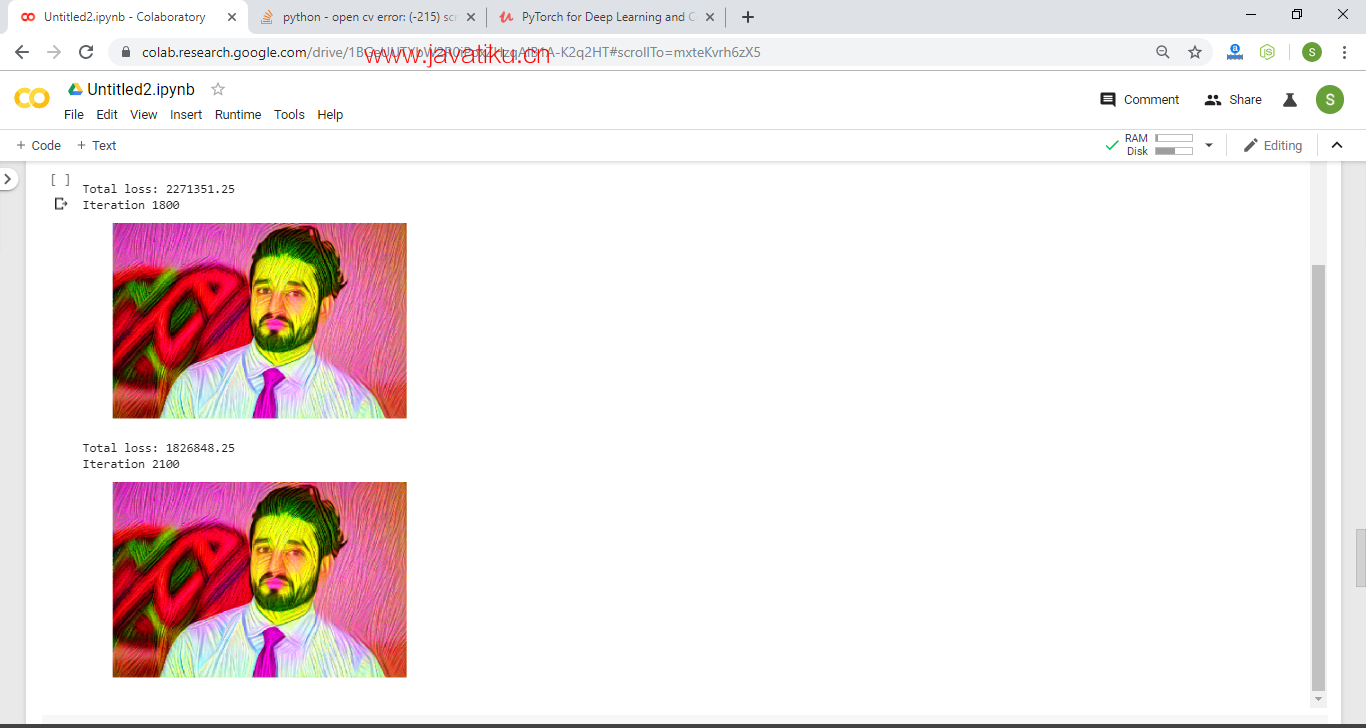
当我们运行代码时,它将给出预期的输出:
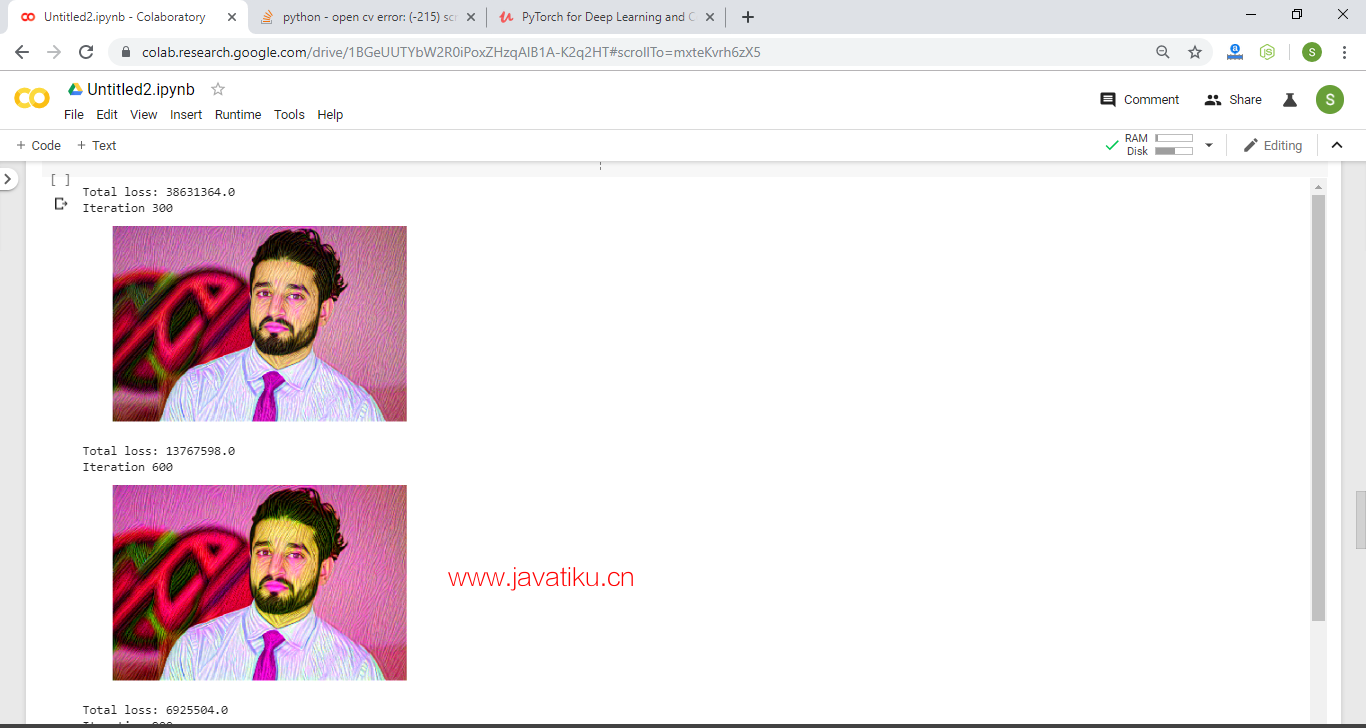
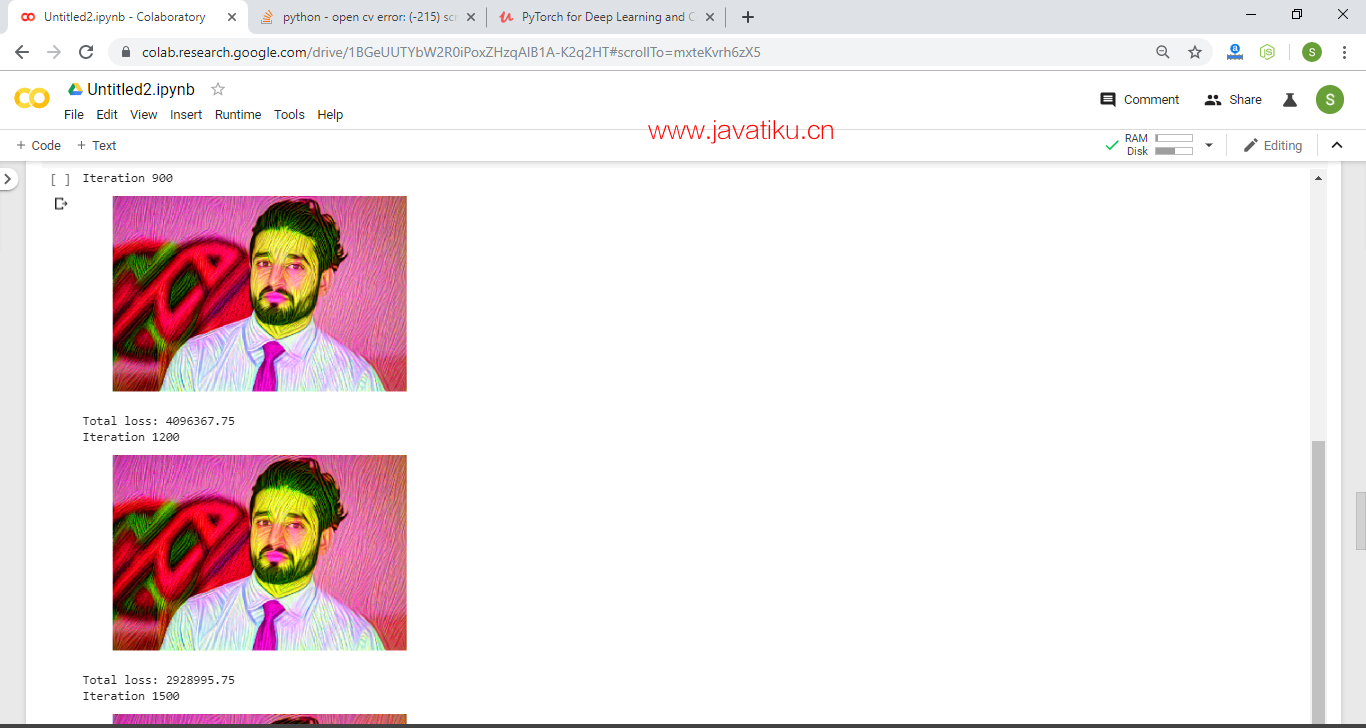
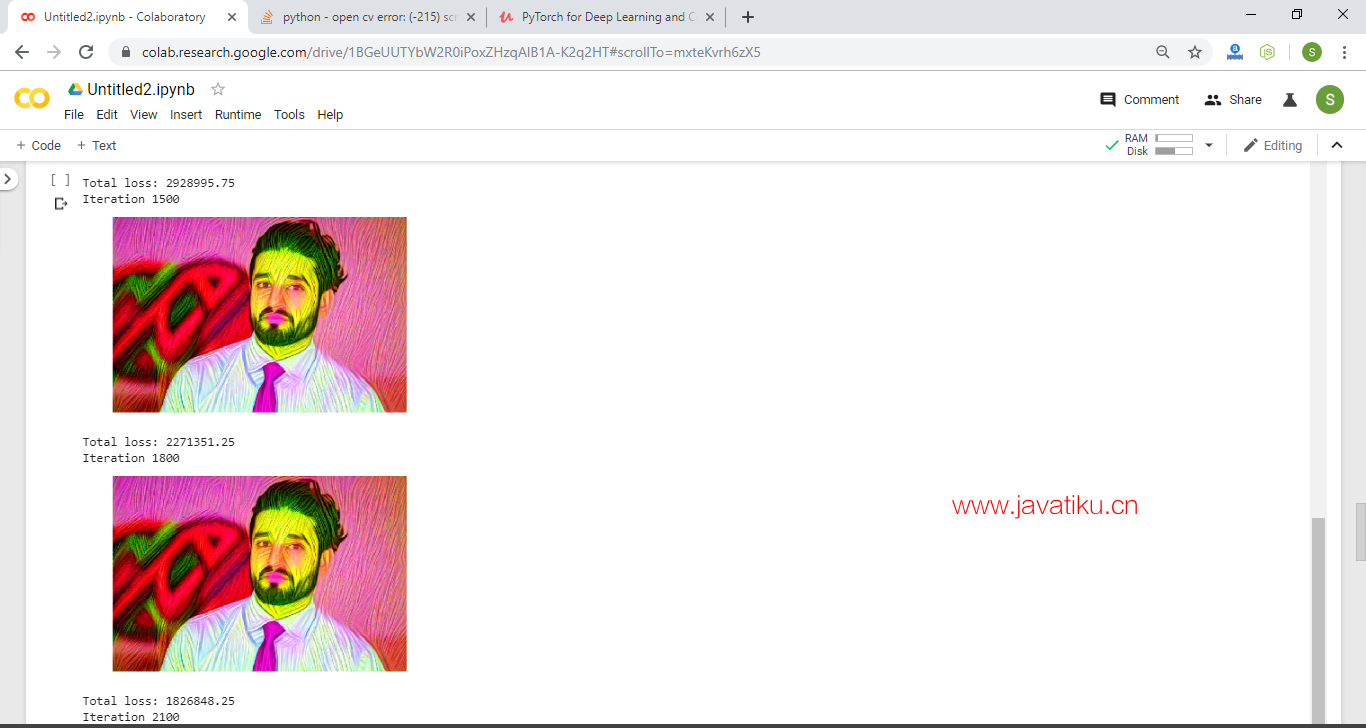
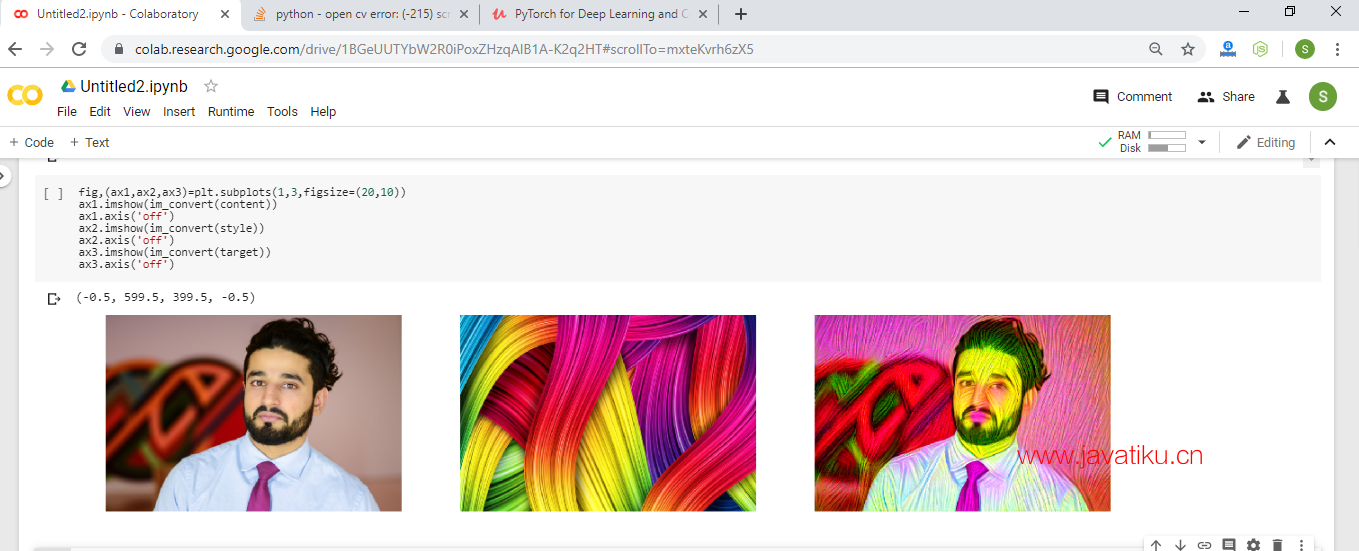
绘制内容、样式和最终目标图像
#Making a grid arrangement with a single row and three columns for our three images
fig,(ax1,ax2,ax3)=plt.subplots(1,3,figsize=(20,10))
#Plotting content image
ax1.imshow(im_convert(content))
ax1.axis('off')
#Plotting style image
ax2.imshow(im_convert(style))
ax2.axis('off')
#Plotting target image
ax3.imshow(im_convert(target))
ax3.axis('off') 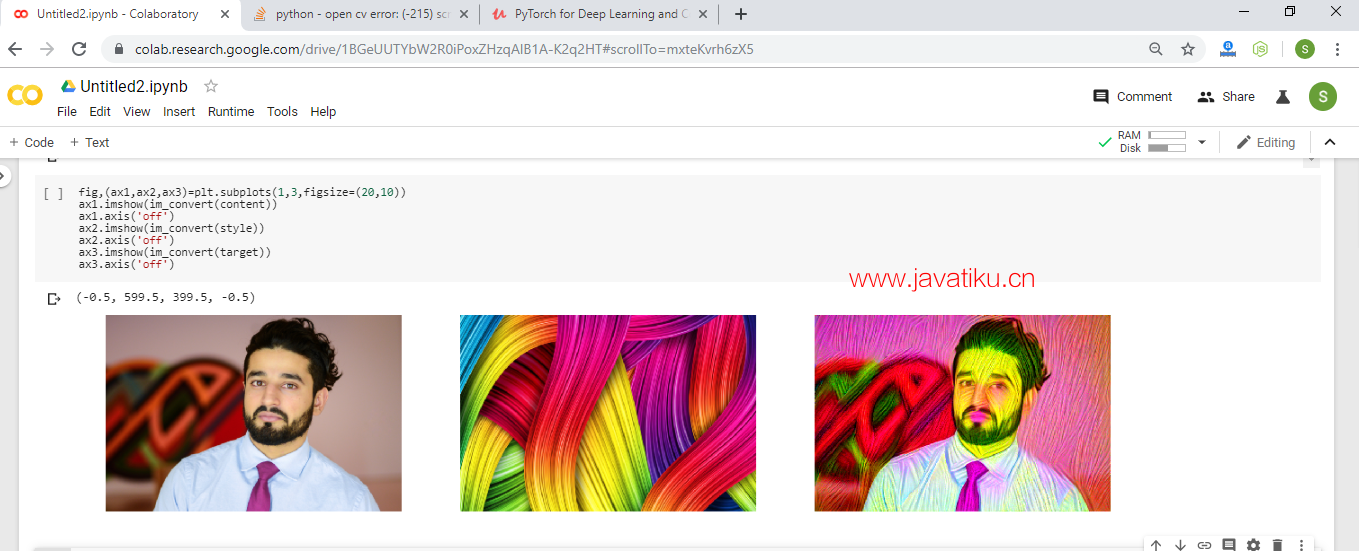
完整代码
#Required Libraries
import torch
import torch.optim as optim
from torchvision import transforms, models
from PIL import Image
import matplotlib.pyplot as plt
import numpy as np

#Creating Model
vgg=models.vgg19(pretrained=True).features
for param in vgg.parameters():
    param.requires_grad_(False)

#Add model to device
device=torch.device("cuda" if torch.cuda.is_available() else "cpu")
vgg.to(device)

#Load Iamge
def load_image(img_path,max_size=400,shape=None):
    image=Image.open(img_path).convert('RGB')
    if max(image.size)>max_size:
      size=max_size
    else:
      size=max(image.size)

    if shape is not None:
       size=shape

    in_transform=transforms.Compose([
        transforms.Resize(size),
        transforms.ToTensor(),
        transforms.Normalize((0.5,0.5,0.5),
                            (0.5,0.5,0.5))
    ])
    image=in_transform(image).unsqueeze(0)
    return image


content=load_image('ab.jpg').to(device)
style=load_image('abc.jpg',shape=content.shape[-2:]).to(device)

#Image Conversion
def im_convert(tensor):
  image=tensor.cpu().clone().detach().numpy()
  image=image.squeeze()
  image=image.transpose(1,2,0)
  image=image*np.array((0.5,0.5,0.5))+np.array((0.5,0.5,0.5))
  image=image.clip(0,1)
  return image

#Plotting Images
fig, (ax1,ax2)=plt.subplots(1,2,figsize=(20,10))
ax1.imshow(im_convert(content))
ax1.axis('off')
ax2.imshow(im_convert(style))
ax2.axis('off')

#Getting Features
def get_features(image,model):
  layers={'0':'conv1_1',
          '5':'conv2_1',
         '10':'conv3_1',
         '19':'conv4_1',
         '21':'conv4_2',
         '28':'conv5_1',}
  features={}
  for name, layer in model._modules.items():
    image=layer(image)
    if name in layers:
      features[layers[name]]=image
  return features

#Making content and style features
content_features=get_features(content,vgg)
style_features=get_features(style, vgg)

#Creating gram matrix
def gram_matrix(tensor):
  _,d,h,w=tensor.size()
  tensor=tensor.view(d,h*w)
  gram=torch.mm(tensor,tensor.t())
  return gram

#Creating style grams
style_grams={layer:gram_matrix(style_features[layer]) for layer in style_features}

#Initializing style weights
style_weights={'conv1_1':1.,
               'conv2_1':0.75,
               'conv3_1':0.2,
               'conv4_1':0.2,
               'conv5_1':0.2}
content_weight=1
style_weight=1e6
target=content.clone().requires_grad_(True).to(device)

#Performing optimization
show_every=300
optimizer=optim.Adam([target],lr=0.003)
steps=2100
height,width,channels=im_convert(target).shape
image_array=np.empty(shape=(300,height,width,channels))
capture_frame=steps/300
counter=0
for ii in range(1,steps+1):
  target_features=get_features(target,vgg)
  content_loss=torch.mean((target_features['conv4_2']-content_features['conv4_2'])**2)
  style_loss=0
  for layer in style_weights:
    target_feature=target_features[layer]
    target_gram=gram_matrix(target_feature)
    style_gram=style_grams[layer]
    layer_style_loss=style_weights[layer]*torch.mean((target_gram-style_gram)**2)
    _,d,h,w=target_feature.shape
    style_loss += layer_style_loss/(d*h*w)
total_loss=content_weight*content_loss+style_weight*style_loss
optimizer.zero_grad()
total_loss.backward()
optimizer.step()

#Plotting output images
if ii % show_every==0:
  print('Total loss:',total_loss.item())
  print('Iteration',ii)
  plt.imshow(im_convert(target))
  plt.axis('off')
  plt.show()
if ii%capture_frame==0:
  image_array[counter]=im_convert(target)
  counter=counter+1

#Plotting content, style and target images
fig,(ax1,ax2,ax3)=plt.subplots(1,3,figsize=(20,10))
ax1.imshow(im_convert(content))
ax1.axis('off')
ax2.imshow(im_convert(style))
ax2.axis('off')
ax3.imshow(im_convert(target))
ax3.axis('off')
输出:
