Pygame教程-Python Pygame(游戏开发库)

Python 是最受欢迎的编程语言,可以说它是下一代编程语言。在计算机科学的每一个新兴领域,Python 都活跃地发挥着作用。Python 拥有众多用于不同领域的库,例如 机器学习(Numpy、Pandas、Matplotlib)、人工智能(Pytorch、TensorFlow)和游戏开发(Pygame、Pyglet)。
在这个教程中,我们将学习使用 Pygame(Python 库)进行游戏开发。
Pygame
- Pygame 是一套跨平台的 Python 模块,用于创建视频游戏。
- 它包含了与 Python 编程语言一起使用的计算机图形和声音库。
- Pygame 是由 Pete Shinners 正式编写,以替代 PySDL。
- Pygame 适合创建客户端应用程序,可以被包装成独立可执行文件。
学习 Pygame 的先决条件:
在学习 pygame 之前,我们需要了解我们想开发什么样的游戏。
- 要学习 pygame,需要具备 Python 的基础知识。
Pygame 安装
在 Windows 中安装 Pygame
在安装 Pygame 之前,应该在系统中安装 Python,最好安装 3.6.1 或更高版本,因为它对初学者更友好,并且运行速度更快。安装 Pygame 主要有两种方式,如下所示:
1. 通过 pip 安装: 安装 Pygame 的好方法是使用 pip 工具(Python 用于安装包的工具)。命令如下:
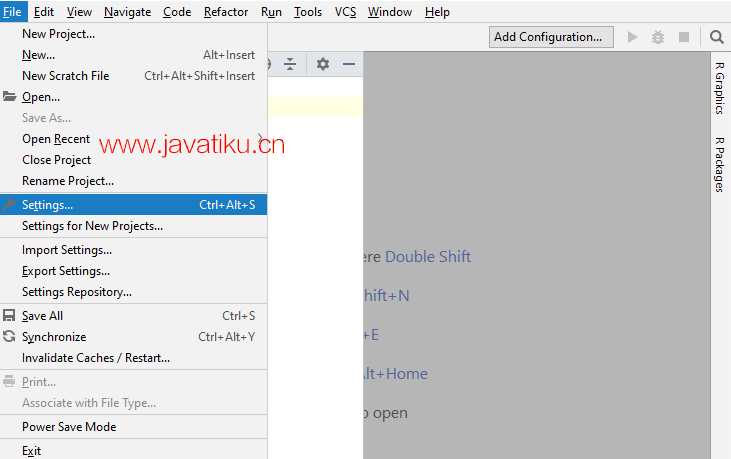
py -m pip install -U pygame --user 2. 通过 IDE 安装: 第二种方法是通过 IDE 安装,这里我们使用 Pycharm IDE。在 Pycharm 中安装 pygame 很简单。我们可以通过在终端运行上述命令或使用以下步骤安装:
- 打开 文件 选项卡,点击 设置 选项。
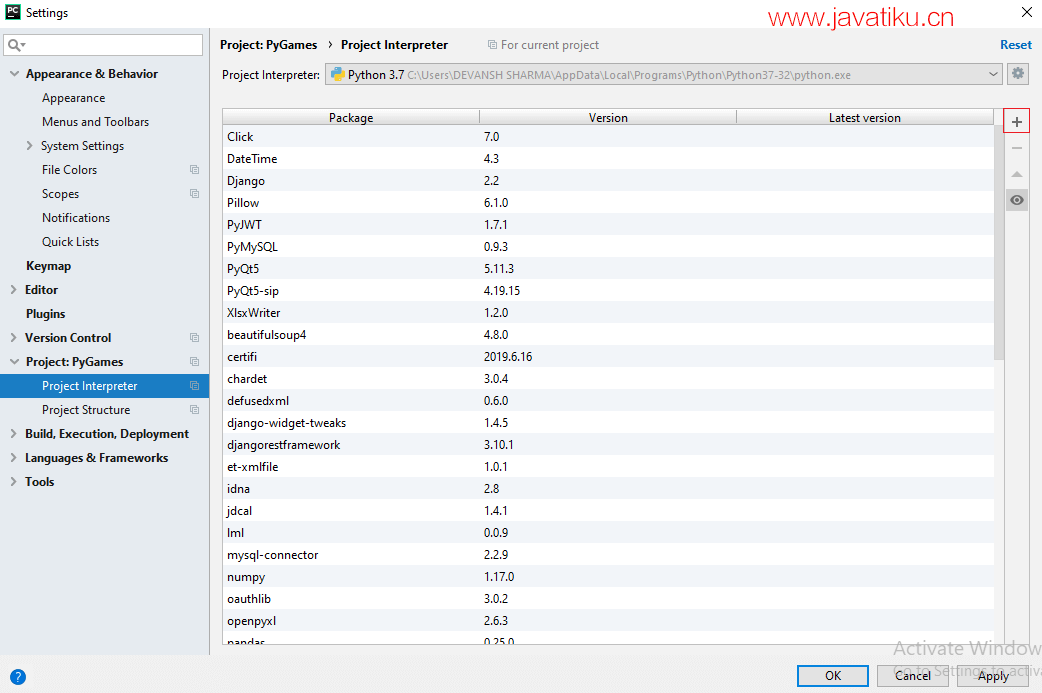
- 选择 项目解释器 并点击 + 图标。
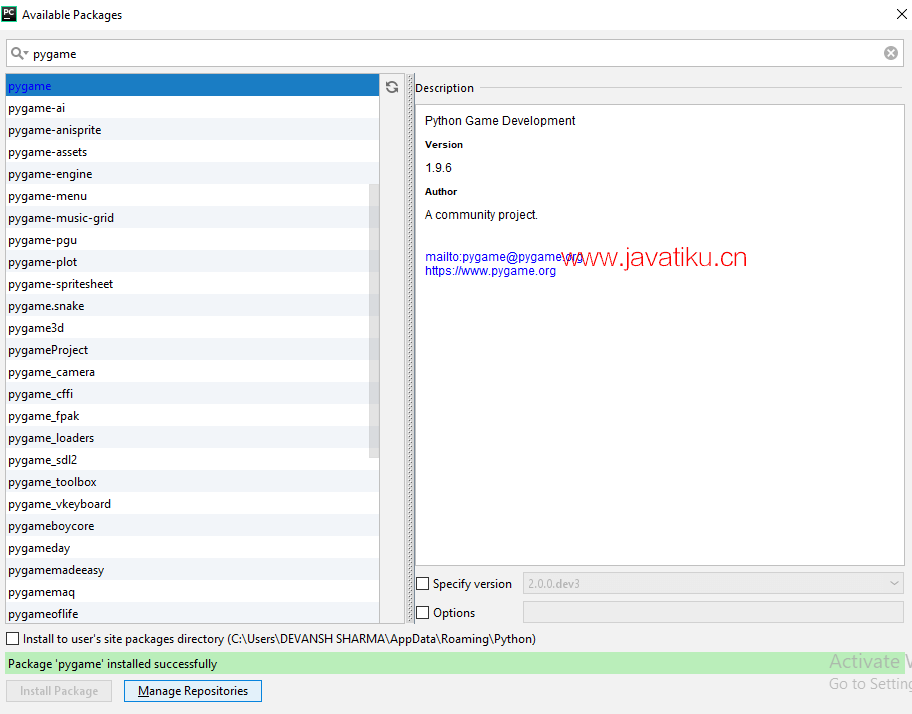
- 它将显示搜索框。搜索 pygame 并点击 安装包 按钮。
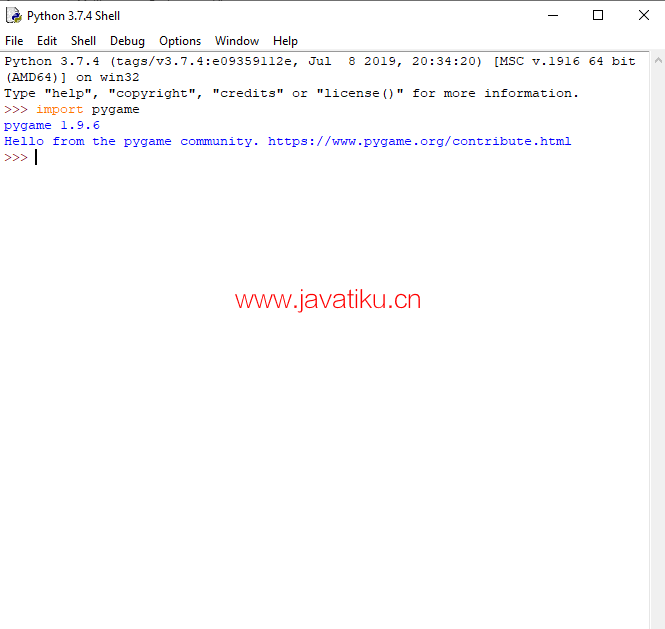
要检查 pygame 是否正确安装,可以在 IDLE 解释器中输入以下命令并按 Enter:
import pygame 如果命令成功运行且没有抛出任何错误,这意味着我们已经成功安装了 Pygame,并找到了正确的 IDLE 版本用于 pygame 编程。
在 Mac 中安装 Pygame
安装 Pygame 的步骤如下:
- 访问 pygame 的官方网站 pygame.org,它将显示如下窗口,下载 pygame-1.9.1release-python.org-32bit-py2.7-macosx10.3.dmg:

注意: 如果您使用的是不同版本的 Python,请下载最后一个链接。
- 双击下载的文件并解压缩。现在双击解压缩的 mpkg 文件以运行安装程序。按照指示安装 pygame。
- 启动终端(Cmd+Space,然后在搜索框中输入 'terminal')。在终端中输入 'python2.7' 并按 Enter。
- Python 应该启动,显示版本为 2.7.2(2.7.1 也可以),并给你一个提示。在 Python 提示符下,输入 'import pygame'。如果没有出现任何错误,一切正常。
简单的 Pygame 示例
这里是一个简单的 pygame 程序,可以让您了解基本的语法。
import pygame

pygame.init()
screen = pygame.display.set_mode((400,500))
done = False

while not done:
    for event in pygame.event.get():
        if event.type == pygame.QUIT:
            done = True
    pygame.display.flip()
输出:
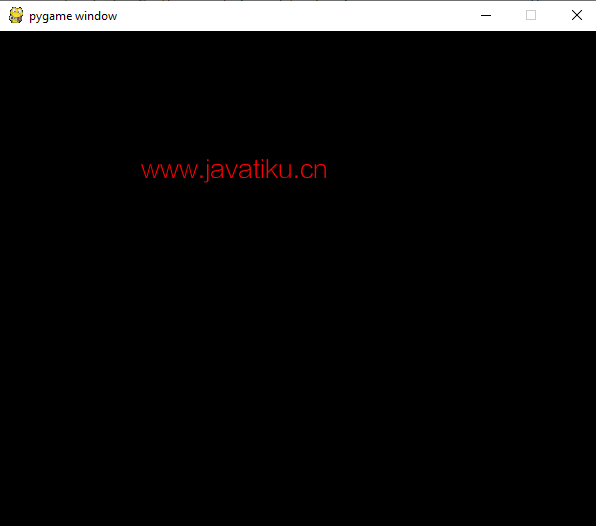
成功执行后,它将显示如下窗口作为输出:
让我们逐行了解上述程序的基本语法:
import pygame - 这提供了访问 pygame 框架的功能,并导入了 pygame 的所有函数。
pygame.init() - 这用于初始化 pygame 所需的所有模块。
pygame.display.set_mode((width, height)) - 这用于显示所需大小的窗口。返回值是一个 Surface 对象,这是我们将进行图形操作的对象。
pygame.event.get()- 这用于清空事件队列。如果我们不调用此函数,窗口消息将开始堆积,游戏将在操作系统看来变得无响应。
pygame.QUIT - 当我们点击窗口角落的关闭按钮时,这用于终止事件。
pygame.display.flip() - Pygame 是双缓冲的,所以这会切换缓冲区。为了使您在游戏屏幕上所做的任何更新可见,必须调用此函数。
Pygame Surface
Pygame Surface 用于显示任何图像。Surface 具有预定义的分辨率和像素格式。Surface 的默认颜色是黑色。其大小由传递的 size 参数定义。
Surface 可以具有许多额外的属性,如 alpha 平面、色键、源矩形剪裁等。blit 例程将在可能的情况下尝试使用硬件加速;否则,它们将使用高度优化的软件 blitting 方法。
Pygame Clock
在 pygame 中,时间以毫秒(1/1000 秒)表示。Pygame 时钟用于追踪时间。时间对于创建运动、播放声音或响应任何事件至关重要。一般来说,我们不是按秒计时。我们按毫秒计时。时钟还提供了各种功能来帮助控制游戏的帧率。以下是一些函数:
tick()
这个函数用于更新时钟。语法如下:
tick(framerate=0) 每帧应该调用一次此方法。它会计算自上次调用以来经过了多少毫秒。framerate 参数是可选的,如果作为参数传递,则该函数将延迟以保持游戏运行速度低于给定的每秒帧数。
tick_busy_loop()
tick_busy_loop() 与 tick() 相同。通过每帧调用 Clock.tick_busy_loop(20),程序将不会以超过每秒 20 帧的速度运行。语法如下:
tick_busy_loop() get_time()
get_time() 用于获取上一次 tick。上两次调用 Clock.tick() 之间经过的毫秒数。
get_time() Pygame Blit
Pygame中的blit操作是将游戏对象渲染到表面的过程,这个过程称为blitting。当我们创建游戏对象时,需要对其进行渲染。如果我们不渲染游戏对象并运行程序,那么输出将是一个黑色窗口。
Blitting是任何游戏中最慢的操作之一,所以我们需要小心,不要在每一帧中都在屏幕上进行太多的blit。用于blitting的主要函数是blit(),其定义如下:
blit()
blit(source,dest,area=None,special_flags=0) 此函数用于将一幅图像绘制到另一幅图像上。可以通过dest参数指定绘制的位置。dest参数可以是代表源左上角的一对坐标。
Pygame 添加图片
要在窗口上添加图片,首先需要通过调用Surface构造器并传入宽高元组来实例化一个空白表面。
surface = pygame.Surface((100,100)) 上面的行创建了一个默认为黑色的100*100像素的空白24位RGB图像。
要实现Surface的透明初始化,传入SRCALPHA参数。
surface = pygame.Surface((100,100), pygame.SRCALPHA) 考虑以下示例,在表面上显示图像:
import pygame
pygame.init()
white = (255, 255, 255)
# assigning values to height and width variable
height = 400
width = 400
# creating the display surface object
# of specific dimension..e(X, Y).
display_surface = pygame.display.set_mode((height, width))

# set the pygame window name
pygame.display.set_caption('Image')

# creating a surface object, image is drawn on it.
image = pygame.image.load(r'C:\Users\DEVANSH SHARMA\Desktop\download.png')

# infinite loop
while True:
    display_surface.fill(white)
    display_surface.blit(image, (0, 0))

    for event in pygame.event.get():
        if event.type == pygame.QUIT:
            pygame.quit()
            # quit the program.
            quit()
        # Draws the surface object to the screen.
        pygame.display.update()
输出:

Pygame Rect
Rect用于在Pygame中绘制矩形。Pygame使用Rect对象来存储和操作矩形区域。Rect可以由left, top, width和height值组合生成。它也可以从已经是Rect的Python对象或具有名为"rect"的属性的对象创建。
rect() 函数用于对矩形的位置或大小进行更改。它返回受影响更改的Rect的新副本。原始矩形不会发生修改。
Rect对象有多种虚拟属性,可用于移动和对齐Rect:
x,y
top, left, right, bottom
topleft, bottomleft, topright, bottomright
midtop, midleft, midbottom, midright
center, centerx, centery
size, width, height
w,h
通过赋值size, width或height可以更改矩形的尺寸。所有其他赋值操作将移动矩形而不改变其大小。
如果Rect的宽度或高度是非零值,则对非零测试返回True。某些方法返回尺寸为0的Rect以表示无效矩形。
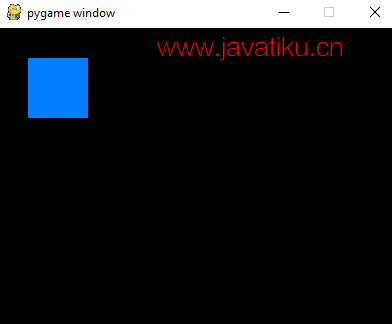
让我们在pygame窗口上创建一个矩形:
import pygame

pygame.init()
screen = pygame.display.set_mode((400, 300))
done = False

while not done:
    for event in pygame.event.get():
        if event.type == pygame.QUIT:
            done = True
    pygame.draw.rect(screen, (0, 125, 255), pygame.Rect(30, 30, 60, 60))

    pygame.display.flip()
执行上述代码后,将在pygame窗口上显示矩形。
Pygame Keydown
Pygame的KEYDOWN和KEYUP可以检测到物理按下和释放键的事件。KEYDOWN 检测按键事件,而KEYUP检测释放键事件。这两个事件(按键和释放键)都有两个属性,如下所示:
- key: key是一个整数id,代表键盘上的每个键。
- mod: 这是一个位掩码,表示事件发生时处于按下状态的所有修饰键。
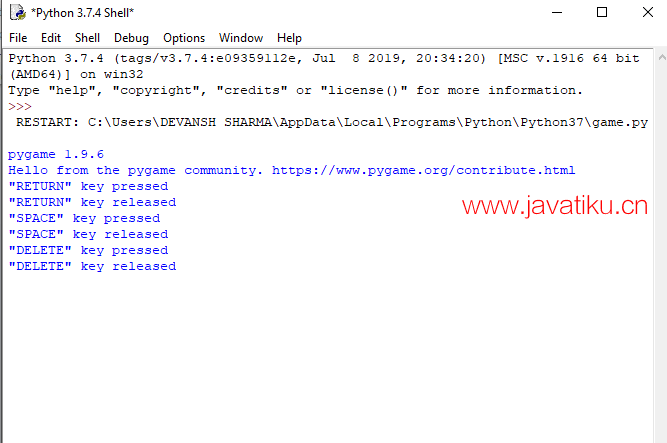
考虑以下按键和释放键的示例。
import pygame
pygame.init()
# sets the window title
pygame.display.set_caption(u'Keyboard events')
# sets the window size
pygame.display.set_mode((400, 400))

while True:
    # gets a single event from the event queue
    event = pygame.event.wait()
    # if the 'close' button of the window is pressed
    if event.type == pygame.QUIT:
        # stops the application
        break
    # Detects the 'KEYDOWN' and 'KEYUP' events
    if event.type in (pygame.KEYDOWN, pygame.KEYUP):
        # gets the key name
        key_name = pygame.key.name(event.key)
        # converts to uppercase the key name
        key_name = key_name.upper()
        # if any key is pressed
        if event.type == pygame.KEYDOWN:
            # prints on the console the key pressed
            print(u'"{}" key pressed'.format(key_name))
        # if any key is released
        elif event.type == pygame.KEYUP:
            # prints on the console the released key
            print(u'"{}" key released'.format(key_name))
输出:
让我们看看另一个示例
import pygame

pygame.init()
screen = pygame.display.set_mode((400, 300))
done = False
is_blue = True
x = 30
y = 30

while not done:
    for event in pygame.event.get():
        if event.type == pygame.QUIT:
            done = True
        if event.type == pygame.KEYDOWN and event.key == pygame.K_SPACE:
            is_blue = not is_blue

    pressed = pygame.key.get_pressed()
    if pressed[pygame.K_UP]: y -= 3
    if pressed[pygame.K_DOWN]: y += 3
    if pressed[pygame.K_LEFT]: x -= 3
    if pressed[pygame.K_RIGHT]: x += 3

    if is_blue:
        color = (0, 128, 255)
    else:
        color = (255, 100, 0)
    pygame.draw.rect(screen, color, pygame.Rect(x, y, 60, 60))

    pygame.display.flip()
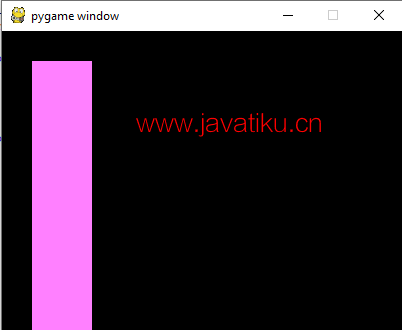
在上述代码中,矩形将在pygame窗口上显示。
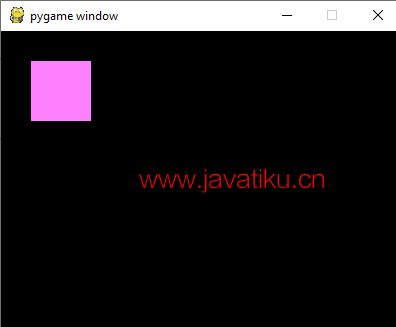
当我们按下方向键时,矩形会向下变形。输出结果如下:
Pygame 绘图
Pygame 提供了几何函数来绘制简单形状到表面。这些函数适用于渲染到任何格式的表面。大多数函数接受宽度参数,表示形状边缘的厚度大小。如果传递的宽度为0,则形状将是实心的(填充的)。
所有绘图函数都接受颜色参数,可以是以下格式之一:
- 一个 pygame.Color 对象
- 一个 (RGB) 三元组(元组/列表)
- 一个 (RGBA) 四元组(元组/列表)
- 一个映射到表面像素格式的整数值
绘制矩形
以下函数用于在给定的表面上绘制矩形。
pygame.draw.rect(surface, color, rect)
pygame.draw.rect(surface, color, rect, width=0)
参数:
- surface - 绘制的屏幕。
- color- 用于给定形状上色的参数。如果我们使用元组,则 alpha 值是可选的。
- rect(Rect)- 绘制矩形,位置和尺寸。
- width(int)- 可选,用于指定线条粗细或表示矩形是否填充。
if width == 0, (default) fill the rectangle
if width > 0, used for line thickness
if width < 0, nothing will be drawn
绘制多边形
以下函数用于在给定的表面上绘制多边形。
- pygame.draw.polygon(surface, color, points)
- pygame.draw.polygon(surface, color, points, width=0)
参数:
- surface - 绘制的屏幕。
- color- 用于给定形状上色的参数。如果我们使用元组,则 alpha 值是可选的。
- points(tuple(coordinate) 或 list(coordinate)): 由3个或更多的(x,y)坐标组成的序列,这些坐标构成多边形的顶点。序列中的每个坐标都必须是元组/列表。
注意: 如果 len(points) < 3 或 points 不是序列,或者 points 不包含数字对,则会引发值错误
绘制椭圆
以下函数用于在给定的表面上绘制椭圆。
pygame.draw.ellipse(surface, color, rect)
pygame.draw.ellipse(surface, color, rect, width=0)
参数:
- surface - 绘制的屏幕。
- color- 用于给定形状上色的参数。如果我们使用元组,则 alpha 值是可选的。
- rect(Rect)- 绘制矩形,位置和尺寸。
绘制直线
此方法用于在给定的表面上绘制直线。没有端帽。
pygame.draw.line(surface,color,start_pos,end_pos,width)
pygame.draw.line(surface,color,start_pos,end_pos,width=1)
参数:
- surface - 绘制的屏幕。
- color- 用于给定形状上色的参数。如果我们使用元组,则 alpha 值是可选的。
- start_pos- 线条的起始位置(x,y)
- end_pos- 线条的结束位置
绘制圆
以下是用于在给定表面上绘制圆的函数。
- circle(surface, color, center, radius)
- circle(surface, color, center, radius, width=0)
参数:
- surface - 绘制的屏幕。
- color- 用于给定形状上色的参数。如果我们使用元组,则 alpha 值是可选的。
- center - 圆心点,为两个int/float的序列,例如 (x,y)
- radius(int 或 float)- 圆的半径,从中心参数测量,如果半径为零,则只会绘制中心像素。
绘制椭圆形弧
以下函数用于在给定的表面上绘制椭圆形弧。
?  arc(surface, color, rect, start_angle, stop_angle)
?  arc(surface, color, rect, start_angle, stop_angle, width=1)
参数:
- surface - 绘制的屏幕。
- color- 用于给定形状上色的参数。如果我们使用元组,则 alpha 值是可选的。
- rect(Rect)- 绘制矩形,位置和尺寸。
- start_angle- 弧的起始角度,以弧度为单位。
- stop_angle- 弧的终止角度,以弧度为单位。
start_angle 和 stop_angle 参数有三种情况:
- 如果 start_angle < stop_angle,则弧将从 start_angle 绘制到 end_angle 的逆时针方向。
- 如果 start_angle > stop_angle,则会向 stop_angle 添加 tau(tau=2*pi)。
- 如果 start_angle == stop_angle,则不会绘制任何内容。
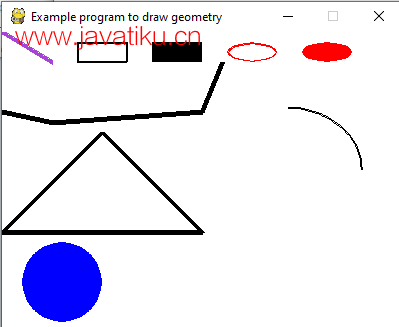
考虑以下示例:
import pygame
from math import pi
pygame.init()
# size variable is using for set screen size
size = [400, 300]
screen = pygame.display.set_mode(size)
pygame.display.set_caption("Example program to draw geometry")
# done variable is using as flag
done = False
clock = pygame.time.Clock()
while not done:
    # clock.tick() limits the while loop to a max of 10 times per second.
        clock.tick(10)

    for event in pygame.event.get():  # User did something
        if event.type == pygame.QUIT:  # If user clicked on close symbol
            done = True  # done variable that we are complete, so we exit this loop

    # All drawing code occurs after the for loop and but
    # inside the main while done==False loop.

    # Clear the default screen background and set the white screen background
    screen.fill((0, 0, 0))

    # Draw on the screen a green line which is 5 pixels wide.
    pygame.draw.line(screen, (0, 255, 0), [0, 0], [50, 30], 5)
    # Draw on the screen a green line which is 5 pixels wide.
    pygame.draw.lines(screen, (0, 0, 0), False, [[0, 80], [50, 90], [200, 80], [220, 30]], 5)

    # Draw a rectangle outline
    pygame.draw.rect(screen, (0, 0, 0), [75, 10, 50, 20], 2)

    # Draw a solid rectangle
    pygame.draw.rect(screen, (0, 0, 0), [150, 10, 50, 20])

    # This draw an ellipse outline, using a rectangle as the outside boundaries
    pygame.draw.ellipse(screen, (255, 0, 0), [225, 10, 50, 20], 2)

    # This draw a solid ellipse, using a rectangle as the outside boundaries
    pygame.draw.ellipse(screen, (255, 0, 0), [300, 10, 50, 20])

    # Draw a triangle using the polygon function
    pygame.draw.polygon(screen, (0, 0, 0), [[100, 100], [0, 200], [200, 200]], 5)

    # This draw a circle
    pygame.draw.circle(screen, (0, 0, 255), [60, 250], 40)

    # This draw an arc
    pygame.draw.arc(screen, (0, 0, 0), [210, 75, 150, 125], 0, pi / 2, 2)

    # This function must write after all the other drawing commands.
    pygame.display.flip()

# Quite the execution when clicking on close
pygame.quit()
输出:
Pygame 文本和字体
Pygame 还提供渲染字体和文本的功能。我们可以使用 pygame.font.SysFont() 函数从系统中加载字体。Pygame 自带内置默认字体,可以通过传递字体名称或 None 来访问。有许多函数可以帮助处理字体。
字体对象是通过 pygame.font.Font() 创建的。实际的字体对象完成了大部分与字体相关的工作。字体对象通常用于将文本渲染到新的 Surface 对象中。一些重要的字体函数如下:
render()
此函数用于在新的 Surface 上绘制文本。Pygame 没有在现有 Surface 上绘制文本的功能。这会创建一个新的 Surface,并在其上渲染指定的文本。语法如下:
render(text, antialias, color, background=None) size()
此函数用于确定渲染文本所需的空间或定位大小。它也可以用于文字换行和其他布局效果。语法如下:
size(bool) set_bold()
此函数用于加粗渲染文本。语法如下:
set_bold(bool) 让我们考虑以下示例:
import pygame
pygame.init()
screen = pygame.display.set_mode((640, 480))
done = False

#load the fonts
font = pygame.font.SysFont("Times new Roman", 72)
# Render the text in new surface
text = font.render("Hello, Pygame", True, (158, 16, 16))
while not done:
    for event in pygame.event.get():
        if event.type == pygame.QUIT:
            done = True
        if event.type == pygame.KEYDOWN and event.key == pygame.K_ESCAPE:
            done = True
    screen.fill((255, 255, 255))
    #We will discuss blit() in the next topic
    screen.blit(text,(320 - text.get_width() // 2, 240 - text.get_height() // 2))

    pygame.display.flip()
输出:
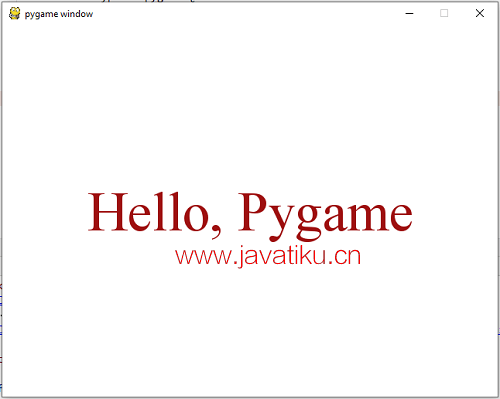
注意- 需要记住的是,某些字体必须安装在用户的计算机上。如果您不确定字体是否已安装,pygame 有以下函数来列出机器上可用的所有字体:
all_font = pygame.font.get_fonts() 还有另一个函数用于实例化默认的系统字体:
font = pygame.font.Font(None,size) 使用以上任一函数,我们可以在游戏中处理引人注目的字体。
Pygame 精灵和碰撞检测
Pygame 精灵是大型图形场景中的二维图像。通常,精灵将是场景中的某个对象。
使用精灵的一个最大优点是能够以组的形式处理它们。如果它们在一个组中,我们可以通过一个命令轻松地移动和绘制所有精灵。
Sprite 模块包含各种简单的类,用于游戏中。使用 Pygame 时,使用 Sprite 类和不同的组类是可选的。
Pygame 提供了精灵和精灵组,有助于碰撞检测。碰撞检测是指屏幕上的两个对象相撞的过程。例如,如果玩家被敌人的子弹击中,那么它可能会失去生命,或者程序需要知道玩家何时触摸到硬币,以便它们自动被拾起。
让我们考虑以下示例:
import pygame
import sys
#Sprite class
class Sprite(pygame.sprite.Sprite):
    def __init__(self, pos):
        pygame.sprite.Sprite.__init__(self)
        self.image = pygame.Surface([20, 20])
        self.image.fill((255, 0, 255))
        self.rect = self.image.get_rect()
        self.rect.center = pos
def main():
    pygame.init()
    clock = pygame.time.Clock()
    fps = 50
    bg = [0, 0, 0]
    size =[300, 300]
    screen = pygame.display.set_mode(size)
    player = Sprite([40, 50])
    # Define keys for player movement
    player.move = [pygame.K_LEFT, pygame.K_RIGHT, pygame.K_UP, pygame.K_DOWN]
    player.vx = 5
    player.vy = 5

    wall = Sprite([100, 60])

    wall_group = pygame.sprite.Group()
    wall_group.add(wall)

    player_group = pygame.sprite.Group()
    player_group.add(player)

    while True:
        for event in pygame.event.get():
            if event.type == pygame.QUIT:
                return False
        key = pygame.key.get_pressed()
        for i in range(2):
            if key[player.move[i]]:
                player.rect.x += player.vx * [-1, 1][i]

        for i in range(2):
            if key[player.move[2:4][i]]:
                player.rect.y += player.vy * [-1, 1][i]
        screen.fill(bg)
        # first parameter takes a single sprite
        # second parameter takes sprite groups
        # third parameter is a kill command if true
        hit = pygame.sprite.spritecollide(player, wall_group, True)
        if hit:
        # if collision is detected call a function to destroy
            # rect
            player.image.fill((255, 255, 255))
        player_group.draw(screen)
        wall_group.draw(screen)
        pygame.display.update()
        clock.tick(fps)
    pygame.quit()
    sys.exit
if __name__ == '__main__':
输出:
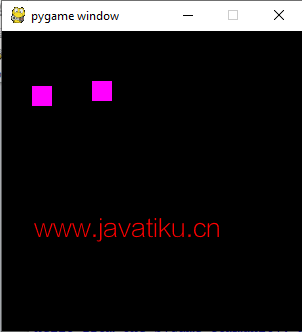
按下箭头键后,一个矩形将与另一个矩形碰撞,输出为:
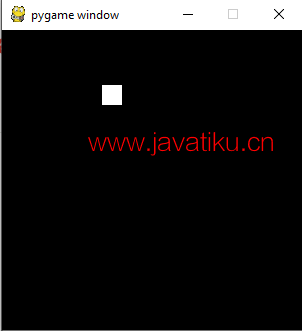
Pyglet
Python 提供了另一个名为 Pyglet 的游戏库,这是一个跨平台的窗口和多媒体库。它用于开发游戏和其他视觉丰富的应用程序。它支持用户界面事件处理、窗口、OpenGL 图形、加载图像和视频以及播放声音和音乐。
Pyglet 的一些特点包括:
- 无需外部安装需求或依赖。
- 支持多窗口和多显示器。
- 可以加载任何格式的图像、声音、音乐和视频。
- Pyglet在BSD开源许可下提供。
- 支持Python 2和3。
安装Pyglet非常简单,只需输入以下命令即可安装。
pip install pyglet 考虑以下示例。
import pyglet
window = pyglet.window.Window()
lable = pyglet.text.Label('Hello world', font_name='Times New Roman', font_size=36,
                          x= window.width//2,y=window.height//2,anchor_x='center', anchor_y='center')
@window.event
def on_draw():
    window.clear()
    lable.draw()
pyglet.app.run()
输出:
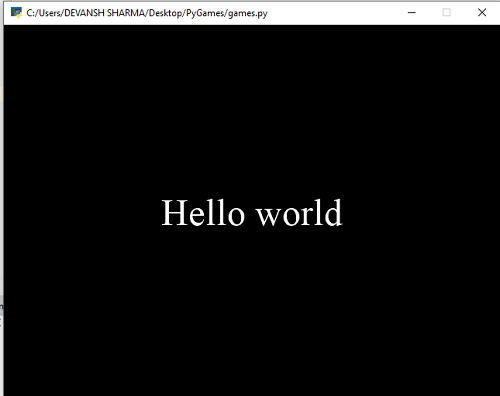
Pygame与Pyglet的比较
| Pyglet | Pygame |
|---|---|
| 3D支持 由于Pyglet与OpenGL紧密合作,它支持3D绘图。 | 易学的Python语法 Pygame使用Python作为脚本语言。Python被广泛认为是最易于掌握的语言之一,即使是初学者。 |
| 跨平台 可以在Windows、Linux和OS X上工作。 | 使用API API非常直观。 |
| 纯Python编写 可以使用其他Python解释器编译。 | 最佳画布系统 Pygame提供了一个绘图系统,允许用户创建和绘制无限数量的画布。 |
| 较少的人气 Pyglet因为社区支持小而不太受欢迎。 | 更受欢迎 Pygame比Pyglet更受欢迎。 |
在这个教程中,我们讨论了通过将开源模块pygame安装到Python 3编程环境中的简单游戏开发编程方法。


