Spring boot教程-使用 Spring Boot Actuator 进行 API 监控

使用 Spring Boot Actuator 进行 API 监控
Spring Boot Actuator
Spring Boot 提供了 Actuator 来有效地监控和管理应用程序。它是一个具有 HTTP 端点的工具(资源所在的地方)。它是 Spring Boot 的子项目。它可以在应用程序中添加多个生产级别的服务,减少了工作量。
当服务的性能下降或发生故障时,我们应该尽快了解原因。特别是在构建微服务时,我们需要在 API 周围构建监控。Spring Boot 在提供监控方面具有很好的支持。
为了使用生产级别的功能,我们将在 pom.xml 中添加 spring-boot-actuator 依赖项。
步骤 1: 打开 pom.xml 并添加以下依赖项:
Spring Boot Starter Actuator: 它为您的服务提供了许多监控设施。
<dependency>
<groupId>org.springframework.boot</groupId>
<artifactId>spring-boot-starter-actuator</artifactId>
</dependency>
Spring Data Rest HAL Browser: HAL 使我们的 API 可导出,并且可以从 API 本身内部轻松发现其文档。
<dependency>
<groupId>org.springframework.data</groupId>
<artifactId>spring-data-rest-hal-browser</artifactId>
</dependency>
Hypertext Application Language(HAL)是一种简单的语言,可以在 API 中为资源之间的超链接提供一种一致且易于使用的方式。Spring Boot Starter Actuator 实际上是以 HAL 格式存在的。HAL 浏览器会搜索 API 并识别链接。它将链接显示在屏幕上,以便我们可以轻松浏览 API。
步骤 2: 重新启动应用程序。
步骤 3: 在浏览器中键入 URL localhost:8080/actuator 并按 Enter 键。如果不起作用,请使用 URL localhost:8080/application。
它会启动 Actuator,并显示三个 URL:self、health 和 info。
{"_links":{"self":{"href":"http://localhost:8080/actuator","templated":false},"health":{"href":"http://localhost:8080/actuator/health","templated":false},"health-component":{"href":"http://localhost:8080/actuator/health/{component}","templated":true},"health-component-instance":{"href":"http://localhost:8080/actuator/health/{component}/{instance}","templated":true},"info":{"href":"http://localhost:8080/actuator/info","templated":false}}} 当我们点击 health 链接时,它会显示应用程序的健康状态。下图中,状态 up 表示应用程序正在运行。

当我们点击 info 链接时,它会显示应用程序的信息。一对空白大括号表示没有可用的信息。

要启用信息,我们需要配置属性。
- 打开 application.properties 文件并启用 web exposure。
management.endpoints.web.exposure.include=* - 重新启动应用程序。
- 通过 URL localhost:8080/actuator 重新启动 Actuator。
它会显示许多 URL。
HAL 浏览器
要访问 HAL 浏览器,将 localhost:8080 输入浏览器并按 Enter 键。
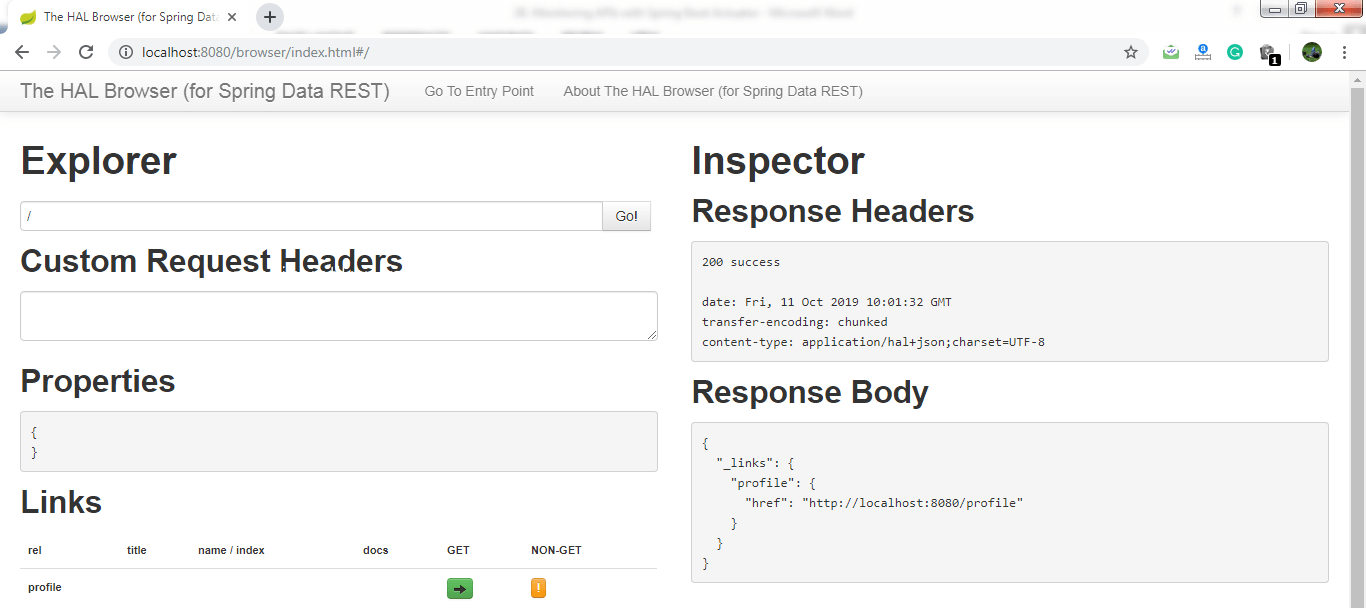
现在我们可以通过 HAL 浏览器访问 Actuator。
在 Explorer 的文本框中键入 /actuator,然后单击 Go 按钮。
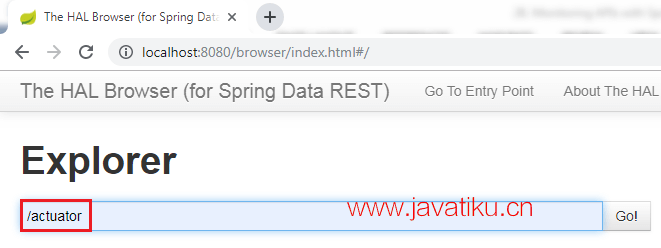
它显示了与 Actuator 相关的所有内容。Actuator 中最重要的是 beans。
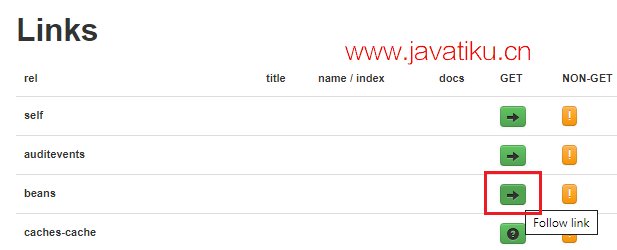
当我们点击 beans 的箭头时,它会显示在 spring boot 项目中配置的所有 beans。
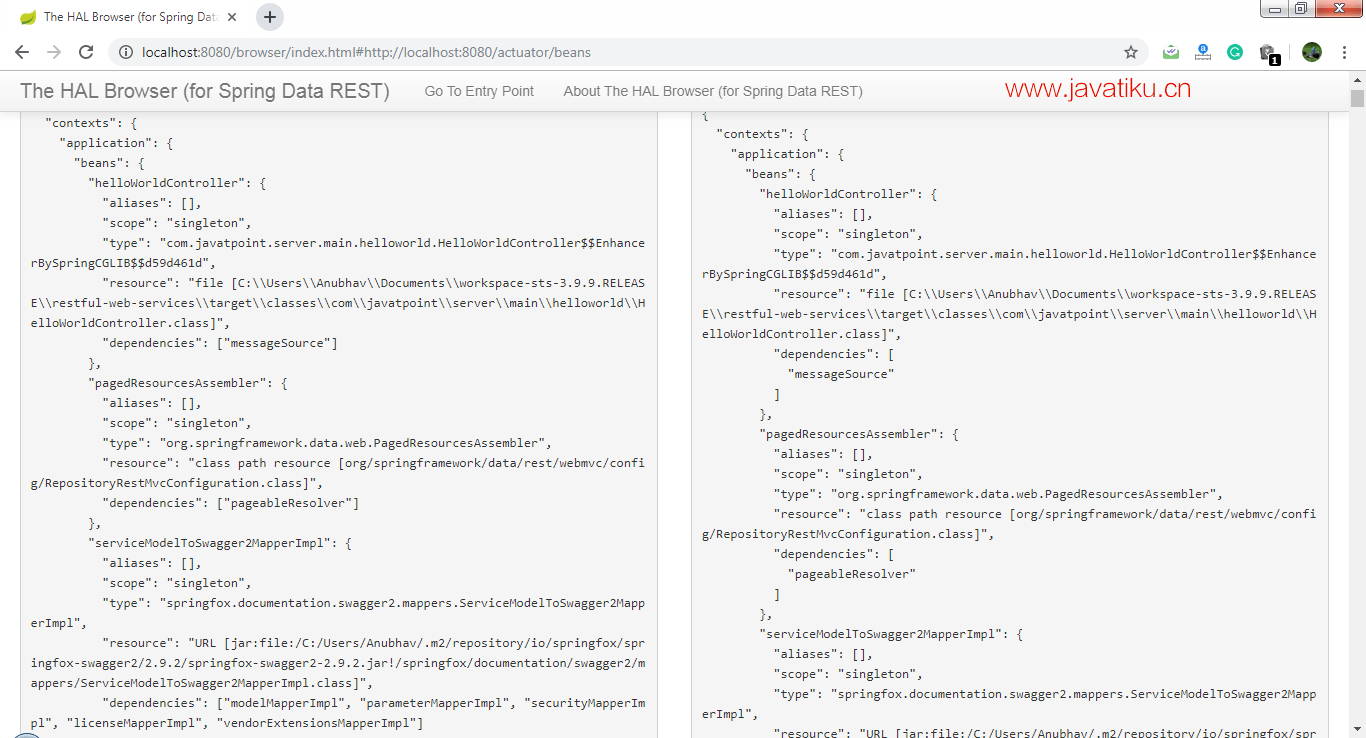
如果我们想要检查应用程序的状态,可以点击 health 链接。

它会显示应用程序的健康状态。

Actuator 中还有另一个名为 metrics 的链接。它显示了有效指标的列表。
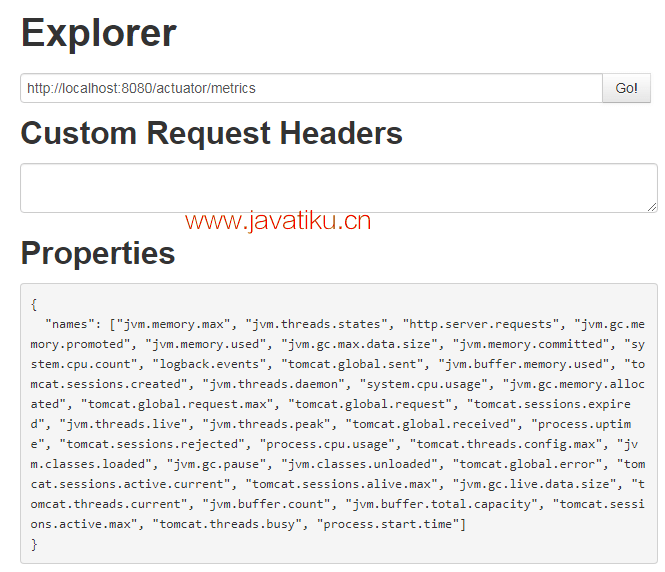
假设我们想要知道应用程序使用了多少内存。我们可以访问 /jvm.memory.max。

在下面的图像中,value 表示应用程序使用的 最大 内存。

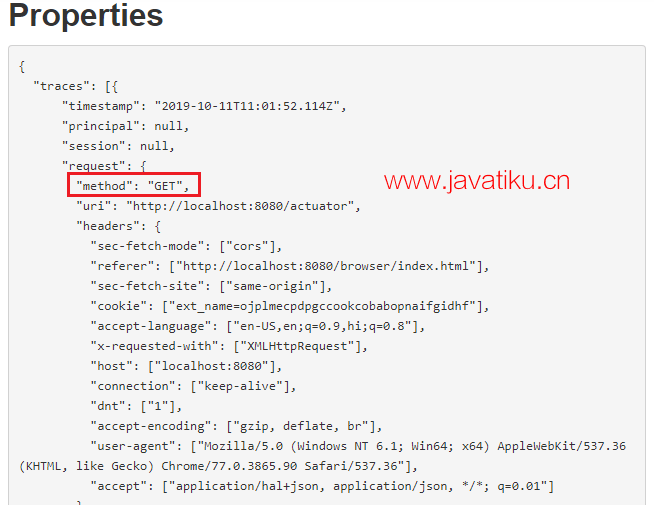
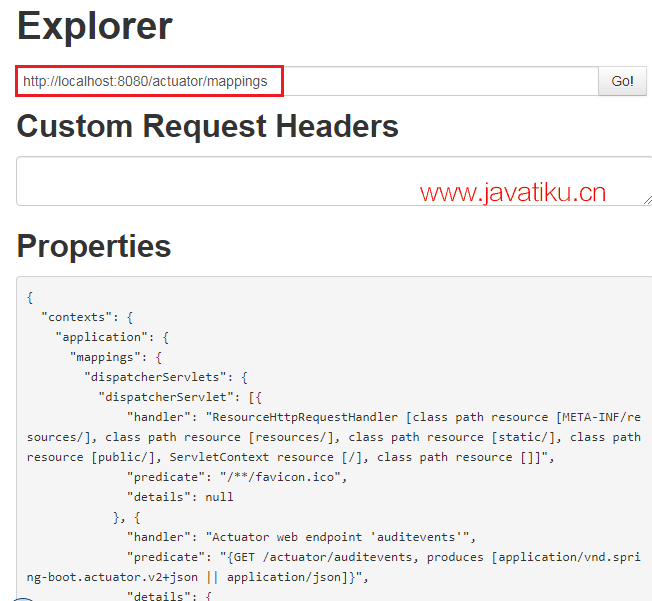
在 Actuator 中还有两个重要的链接,即 httptrace 和 mapping。

httptrace 显示我们之前执行过的所有请求。我们可以看到先前执行的请求的所有细节,如下所示:
mapping 显示了映射到 URL 的所有不同内容。当我们创建 Web 服务或 Web 应用程序时,会映射许多 URL。
在本节中,我们学习了如何使用 Actuator 进行监控。


