Vuejs教程-Vue.js 自定义指令

在 Vue.js 应用程序中,可以使用指令使其更具可重用性和简单性。指令就像是在 Vue.js 应用程序中以特定方式执行操作的指示。我们在 Vue.js 条件和循环页面中已经使用了简单的条件指令,例如 v-if、v-show、v-else、v-for、v-bind、v-model、v-on 等。
在这里,我们将学习如何创建自定义指令并将其用法类比于 Vue.js 组件页面,因为 Vue.js 允许我们创建自己的自定义指令。
语法:
Vue.directive('name_of_the_directive', {
  bind(el, binding, vnode) {
    // Directive implementation here
  }
})
要创建自定义指令,我们需要使用 Vue.directive 和指令的名称,就像上面的语法所示。让我们通过一个示例来演示如何创建自定义指令以及如何使用它。
Index.html 文件:
<!DOCTYPE html>
<html>
<head>
  <title>Vue.js Custom Directive</title>
  <link rel="stylesheet" href="index.css">
  <script src="https://cdn.jsdelivr.net/npm/vue/dist/vue.js"></script>
</head>
<body>
  <div id="directive">
    <div v-changestyle>Vue.js Custom Directive Example</div>
  </div>
  <script src="index.js"></script>
</body>
</html>
Index.js 文件:
Vue.directive("changestyle", {
  bind(el, binding, vnode) {
    console.log(el);
    el.style.color = "red";
    el.style.fontSize = "20px";
  }
});

var vm = new Vue({
  el: '#directive',
  data: {},
  methods: {},
});
让我们使用一个简单的 CSS 文件使输出更具吸引力。
Index.css 文件:
html, body {
  margin: 5px;
  padding: 0;
}
执行程序后,您将看到以下输出:
输出:

示例解释
在上面的示例中,您可以看到我们创建了一个名为 "changestyle" 的自定义指令,如下所示:
Vue.directive("changestyle", {
  bind(el, binding, vnode) {
    console.log(el);
    el.style.color = "red";
    el.style.fontSize = "20px";
  }
});
现在,将自定义指令 "changestyle" 分配给一个 div,如下所示:
<div v-changestyle>Vue.js Custom Directive Example</div>如何向自定义指令传递值?
我们可以通过将值绑定到自定义指令来将值传递给自定义指令。绑定类似于传递给自定义指令的参数。
语法:
v-changestyle="{color:'the_color_name'}".让我们通过一个示例演示如何向自定义指令传递值。
Index.html:
<!DOCTYPE html>
<html>
<head>
  <title>Vue.js Custom Directive</title>
  <link rel="stylesheet" href="index.css">
  <script src="https://cdn.jsdelivr.net/npm/vue/dist/vue.js"></script>
</head>
<body>
  <div id="directive">
    <div v-changestyle="{color:'green'}">Passing value to custom directive example</div>
  </div>
  <script src="index.js"></script>
</body>
</html>
Index.js:
Vue.directive("changestyle", {
  bind(el, binding, vnode) {
    console.log(el);
    console.log(binding.value.color);
    console.log(vnode);
    el.style.color = binding.value.color;
    el.style.fontSize = "20px";
  }
});

var vm = new Vue({
  el: '#directive',
  data: {},
  methods: {},
});
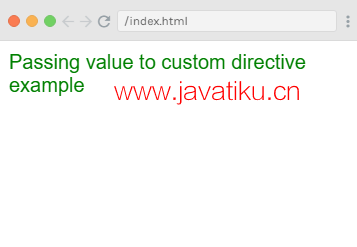
执行程序后,您将看到以下输出:
输出:

您可以看到将值传递给指令,文本的颜色更改为绿色。通过以下代码传递值:
<div v-changestyle="{color:'green'}">
    Passing value to custom directive example
</div>
通过以下代码进行访问:
Vue.directive("changestyle", {
  bind(el, binding, vnode) {
    console.log(el);
    console.log(binding.value.color);
    console.log(vnode);
    el.style.color = binding.value.color;
    el.style.fontSize = "20px";
  }
});
在自定义指令中使用过滤器
Vue.js 支持过滤器,可用于文本格式化。过滤器通常与 v-bind 和插值({{}})一起使用。我们需要在过滤器的 JavaScript 表达式末尾使用一个管道符号。
让我们看一个示例,演示如何在自定义指令中使用过滤器。
Index.html 文件:
<!DOCTYPE html>
<html>
<head>
  <title>Vue.js Custom Directive</title>
  <link rel="stylesheet" href="index.css">
  <script src="https://cdn.jsdelivr.net/npm/vue/dist/vue.js"></script>
</head>
<body>
  <div id="directive">
    <input v-model="name" placeholder="Enter Your Name"><br>
    <span style="font-size:20px;"><b>Letter count is : {{name | countletters}}</b></span>
  </div>
  <script src="index.js"></script>
</body>
</html>
Index.js 文件:
var vm = new Vue({
  el: '#directive',
  data: {
    name: ""
  },
  filters: {
    countletters: function(value) {
      return value.length;
    }
  }
});
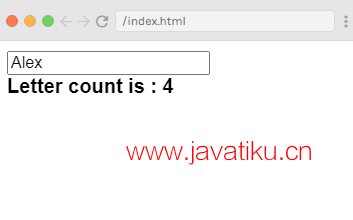
执行程序后,您将看到以下输出:
输出:

当您在上面的框中键入任何文本时,您将得到字母计数,如下所示:

示例解释
在上面的示例中,您可以看到我们创建了一个简单的名为 "countletters" 的过滤器。countletters 过滤器用于计算文本框中输入的字符数。我们需要使用 filter 属性并定义所用的过滤器,如下所示:
filters: {
  countletters: function(value) {
    return value.length;
  }
}
在这里,我们定义了 countletters 方法,然后返回输入字符串的长度。
现在,我们使用管道操作符和过滤器的名称 "countletters" 来在输出中显示过滤器的结果:
<span style="font-size:20px;">
    <b>Letter count is : {{name | countletters}}</b>
</span>


