Vuejs教程-Vue.js 动画

Vuejs教程-Vue.js 过渡和 Vue.js 动画之间唯一的区别在于,在 Vue.js 动画中,v-enter 不会在元素插入后立即移除,而是在动画结束事件上移除。
让我们通过一个示例来了解动画的概念,并查看动画如何在应用程序中运行。
Index.html 文件:
<!DOCTYPE html>
<html>
<head>
  <title>Vue.js Animation</title>
  <link rel="stylesheet" href="index.css">
  <script src="https://cdn.jsdelivr.net/npm/vue/dist/vue.js"></script>
</head>
<body>
<style>
  .shiftx-enter-active {
    animation: shift-in 2s;
  }
  .shiftx-leave-active {
    animation: shift-in 2s reverse;
  }
  @keyframes shift-in {
    0%  {transform:rotateX(0deg);}
    25% {transform:rotateX(90deg);}
    50% {transform:rotateX(120deg);}
    75% {transform:rotateX(180deg);}
    100% {transform:rotateX(360deg);}
  }
</style>
<div id="databinding">
  <p>点击下面的按钮查看动画效果。</p>
  <button v-on:click="show = !show">点击这里</button>
  <transition name="shiftx">
    <p v-show="show">
      <img src="https://www.flowerpower.com.au/media/catalog/product/image/287189f77f/love-you-rose.jpg" style="width:100px;height:100px;" />
    </p>
  </transition>
</div>
<script src="index.js"></script>
</body>
</html>
Index.js 文件:
var vm = new Vue({
  el: '#databinding',
  data: {
    show: true
  },
  methods: {
  }
})
让我们使用一个简单的 CSS 文件使输出更具吸引力。
Index.css 文件:
html, body {
  margin: 5px;
  padding: 0;
}
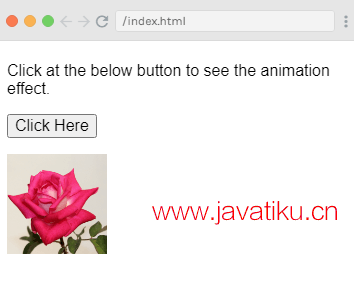
执行程序后,您将看到以下输出:
输出:

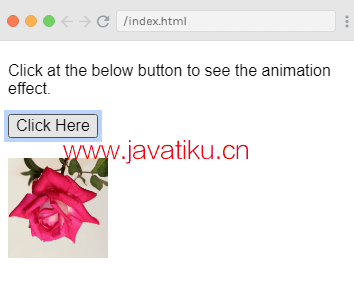
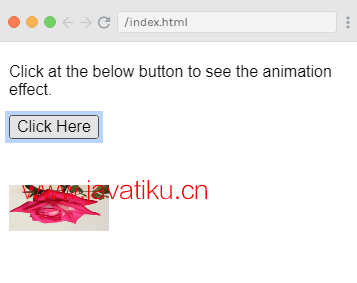
当您点击“点击这里”按钮时,您可以看到动画效果。图像将从 0 度旋转到 360 度,并最后消失。参见以下图片:

另一个截图:

示例解释
在上面的示例中,您可以看到我们使用了与过渡效果相同的类。在这里,我们将图像封装在 p 标签中,如下所示:
<transition name="shiftx">
  <p v-show="show">
    <img src="https://www.flowerpower.com.au/media/catalog/product/image/287189f77f/love-you-rose.jpg" style="width:100px;height:100px;" />
  </p>
</transition>
在这里,过渡的名称是 shiftx,并且类应用为以下 CSS 代码:
<style>
  .shiftx-enter-active {
    animation: shift-in 2s;
  }
  .shiftx-leave-active {
    animation: shift-in 2s reverse;
  }
  @keyframes shift-in {
    0%  {transform:rotateX(0deg);}
    25% {transform:rotateX(90deg);}
    50% {transform:rotateX(120deg);}
    75% {transform:rotateX(180deg);}
    100% {transform:rotateX(360deg);}
  }
</style>
在上面的代码中,类在过渡名称内部定义,即 shiftx-enter-active 和 shiftx-leave-active。
动画是通过 keyframes 定义的,从 0% 到 100% 的每个 keyframe 的 transform 都以度为单位定义:
@keyframes shift-in {
  0%  {transform:rotateX(0deg);}
  25% {transform:rotateX(90deg);}
  50% {transform:rotateX(120deg);}
  75% {transform:rotateX(180deg);}
  100% {transform:rotateX(360deg);}
}
自定义过渡类
Vue.js 允许您通过提供以下属性来指定自己的自定义过渡类。这些属性可以添加到过渡元素中。
enter-classenter-active-classenter-to-class(在 2.1.8+ 版本中添加)leave-classleave-active-classleave-to-class(在 2.1.8+ 版本中添加)
通常在我们想使用外部 CSS 库(例如 animate.css)时使用自定义类。
让我们通过一个示例来了解自定义过渡类的概念,并查看它们在应用程序中的工作方式。
Index.html 文件:
<!DOCTYPE html>
<html>
<head>
  <title>Vue.js Animation</title>
  <link href="https://cdn.jsdelivr.net/npm/animate.css@3.5.1" rel="stylesheet" type="text/css">
  <script src="https://cdn.jsdelivr.net/npm/vue/dist/vue.js"></script>
  <script type="text/javascript" src="js/vue.js"></script>
</head>
<body>
  <div id="animation" style="text-align:center">
    <button @click="show = !show"><span style="font-size:25px;">Click Here</span></button>
    <transition name="custom-classes-transition" enter-active-class="animated swing" leave-active-class="animated bounceIn">
      <p v-if="show"><span style="font-size:25px;">See the animation effect</span></p>
    </transition>
  </div>
<script src="index.js"></script>
</body>
</html>
Index.js 文件:
var vm = new Vue({
  el: '#animation',
  data: {
    show: true
  }
})
执行程序后,您将看到以下输出:
输出:

当您点击“Click Here”按钮时,您可以看到两种类型的动画。第一个应用于上面示例的动画是:
<transition name="custom-classes-transition" enter-active-class="animated swing" leave-active-class="animated bounceIn">
  <p v-if="show"><span style="font-size:25px;">See the animation effect</span></p>
</transition>
输出:

第二个动画是:
<transition name="custom-classes-transition" enter-active-class="animated swing" leave-active-class="animated bounceIn">
  <p v-if="show"><span style="font-size:25px;">See the animation effect</span></p>
</transition>
输出:

在这里,我们使用了第三方库 animate.css 来演示如何在示例中使用自定义动画类。


