Diango教程-Django CRUD(创建、读取、更新、删除)

要创建执行 CRUD 操作的 Django 应用程序,请按照以下步骤操作。
1. 创建项目
$ django-admin startproject crudexample 
2. 创建一个应用程序
$ python3 manage.py startapp employee 
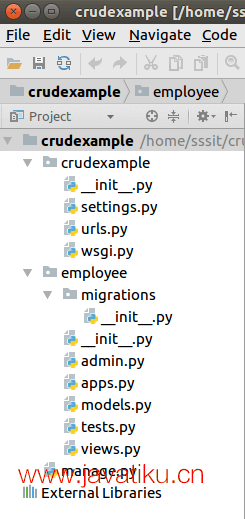
三、项目结构
最初,我们的项目如下所示:
4. 数据库设置
在mysql中创建数据库djangodb,并配置到django项目的settings.py文件中。请参阅示例。
// 设置.py
DATABASES = {
    'default': {
        'ENGINE': 'django.db.backends.mysql',
        'NAME': 'djangodb',
        'USER':'root',
        'PASSWORD':'mysql',
        'HOST':'localhost',
        'PORT':'3306'
    }
}
5. 创建模型
将以下代码放入models.py文件中。
// 模型.py
from django.db import models
class Employee(models.Model):
    eid = models.CharField(max_length=20)
    ename = models.CharField(max_length=100)
    eemail = models.EmailField()
    econtact = models.CharField(max_length=15)
    class Meta:
        db_table = "employee"
6. 创建模型表单
// 表单.py
from django import forms
from employee.models import Employee
class EmployeeForm(forms.ModelForm):
    class Meta:
        model = Employee
        fields = "__all__"
7. 创建视图函数
// 视图.py
from django.shortcuts import render, redirect
from employee.forms import EmployeeForm
from employee.models import Employee
# Create your views here.
def emp(request):
    if request.method == "POST":
        form = EmployeeForm(request.POST)
        if form.is_valid():
            try:
                form.save()
                return redirect('/show')
            except:
                pass
    else:
        form = EmployeeForm()
    return render(request,'index.html',{'form':form})
def show(request):
    employees = Employee.objects.all()
    return render(request,"show.html",{'employees':employees})
def edit(request, id):
    employee = Employee.objects.get(id=id)
    return render(request,'edit.html', {'employee':employee})
def update(request, id):
    employee = Employee.objects.get(id=id)
    form = EmployeeForm(request.POST, instance = employee)
    if form.is_valid():
        form.save()
        return redirect("/show")
    return render(request, 'edit.html', {'employee': employee})
def destroy(request, id):
    employee = Employee.objects.get(id=id)
    employee.delete()
    return redirect("/show")
8. 提供路由
提供 URL 模式以与视图功能进行映射。
// url.py
from django.contrib import admin
from django.urls import path
from employee import views
urlpatterns = [
    path('admin/', admin.site.urls),
    path('emp', views.emp),
    path('show',views.show),
    path('edit/<int:id>', views.edit),
    path('update/<int:id>', views.update),
    path('delete/<int:id>', views.destroy),
]
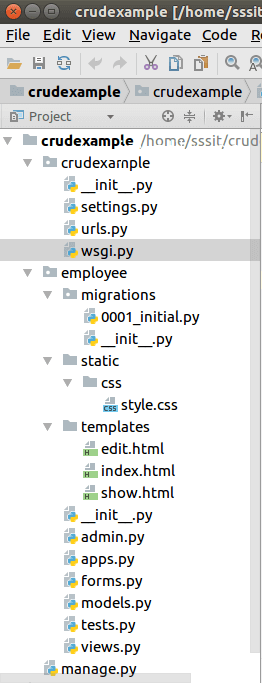
9. 组织模板
在员工应用程序中创建一个templates文件夹,并在该目录中创建三个(索引、编辑、显示)html 文件。下面给出了每个的代码。
// 索引.html
<!DOCTYPE html>
<html lang="en">
<head>
    <meta charset="UTF-8">
    <title>Index</title>
    {% load staticfiles %}
    <link rel="stylesheet" href="{% static 'css/style.css' %}"/>
</head>
<body>
<form method="POST" class="post-form" action="/emp">
        {% csrf_token %}
    <div class="container">
<br>
    <div class="form-group row">
    <label class="col-sm-1 col-form-label"></label>
    <div class="col-sm-4">
    <h3>Enter Details</h3>
    </div>
  </div>
    <div class="form-group row">
    <label class="col-sm-2 col-form-label">Employee Id:</label>
    <div class="col-sm-4">
      {{ form.eid }}
    </div>
  </div>
  <div class="form-group row">
    <label class="col-sm-2 col-form-label">Employee Name:</label>
    <div class="col-sm-4">
      {{ form.ename }}
    </div>
  </div>
    <div class="form-group row">
    <label class="col-sm-2 col-form-label">Employee Email:</label>
    <div class="col-sm-4">
      {{ form.eemail }}
    </div>
  </div>
    <div class="form-group row">
    <label class="col-sm-2 col-form-label">Employee Contact:</label>
    <div class="col-sm-4">
      {{ form.econtact }}
    </div>
  </div>
    <div class="form-group row">
    <label class="col-sm-1 col-form-label"></label>
    <div class="col-sm-4">
    <button type="submit" class="btn btn-primary">Submit</button>
    </div>
  </div>
    </div>
</form>
</body>
</html>
// 显示.html
<!DOCTYPE html>
<html lang="en">
<head>
    <meta charset="UTF-8">
    <title>Employee Records</title>
     {% load staticfiles %}
    <link rel="stylesheet" href="{% static 'css/style.css' %}"/>
</head>
<body>
<table class="table table-striped table-bordered table-sm">
    <thead class="thead-dark">
    <tr>
        <th>Employee ID</th>
        <th>Employee Name</th>
        <th>Employee Email</th>
        <th>Employee Contact</th>
        <th>Actions</th>
    </tr>
    </thead>
    <tbody>
{% for employee in employees %}
    <tr>
        <td>{{ employee.eid }}</td>
        <td>{{ employee.ename }}</td>
        <td>{{ employee.eemail }}</td>
        <td>{{ employee.econtact }}</td>
        <td>
            <a href="/edit/{{ employee.id }}"><span class="glyphicon glyphicon-pencil" >Edit</span></a>
            <a href="/delete/{{ employee.id }}">Delete</a>
        </td>
    </tr>
{% endfor %}
    </tbody>
</table>
<br>
<br>
<center><a href="/emp" class="btn btn-primary">Add New Record</a></center>
</body>
</html>
// 编辑.html
<!DOCTYPE html>
<html lang="en">
<head>
    <meta charset="UTF-8">
    <title>Index</title>
    {% load staticfiles %}
    <link rel="stylesheet" href="{% static 'css/style.css' %}"/>
</head>
<body>
<form method="POST" class="post-form" action="/update/{{employee.id}}">
        {% csrf_token %}
    <div class="container">
<br>
    <div class="form-group row">
    <label class="col-sm-1 col-form-label"></label>
    <div class="col-sm-4">
    <h3>Update Details</h3>
    </div>
  </div>
    <div class="form-group row">
    <label class="col-sm-2 col-form-label">Employee Id:</label>
    <div class="col-sm-4">
        <input type="text" name="eid" id="id_eid" required maxlength="20" value="{{ employee.eid }}"/>
    </div>
  </div>
  <div class="form-group row">
    <label class="col-sm-2 col-form-label">Employee Name:</label>
    <div class="col-sm-4">
        <input type="text" name="ename" id="id_ename" required maxlength="100" value="{{ employee.ename }}" />
    </div>
  </div>
    <div class="form-group row">
    <label class="col-sm-2 col-form-label">Employee Email:</label>
    <div class="col-sm-4">
        <input type="email" name="eemail" id="id_eemail" required maxlength="254" value="{{ employee.eemail }}" />
    </div>
  </div>
    <div class="form-group row">
    <label class="col-sm-2 col-form-label">Employee Contact:</label>
    <div class="col-sm-4">
        <input type="text" name="econtact" id="id_econtact" required maxlength="15" value="{{ employee.econtact }}" />
    </div>
  </div>
    <div class="form-group row">
    <label class="col-sm-1 col-form-label"></label>
    <div class="col-sm-4">
    <button type="submit" class="btn btn-success">Update</button>
    </div>
  </div>
    </div>
</form>
</body>
</html>
10. 静态文件处理
在员工应用程序中创建一个static/css文件夹,并将 css 放入其中。
11. 项目结构
12. 创建迁移
为创建的模型员工创建迁移,使用以下命令。
$ python3 manage.py makemigrations 
迁移后,再执行一项命令以将迁移反映到数据库中。但在此之前,请在 settings.py 文件的 INSTALLED_APPS 中提及应用程序(员工)的名称。
// 设置.py
INSTALLED_APPS = [
    'django.contrib.admin',
    'django.contrib.auth',
    'django.contrib.contenttypes',
    'django.contrib.sessions',
    'django.contrib.messages',
    'django.contrib.staticfiles',
    'employee'
]
运行命令来迁移迁移。
$ python3 manage.py migrate 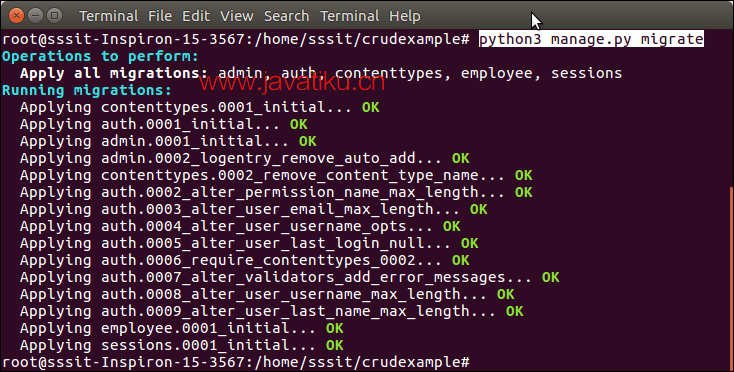
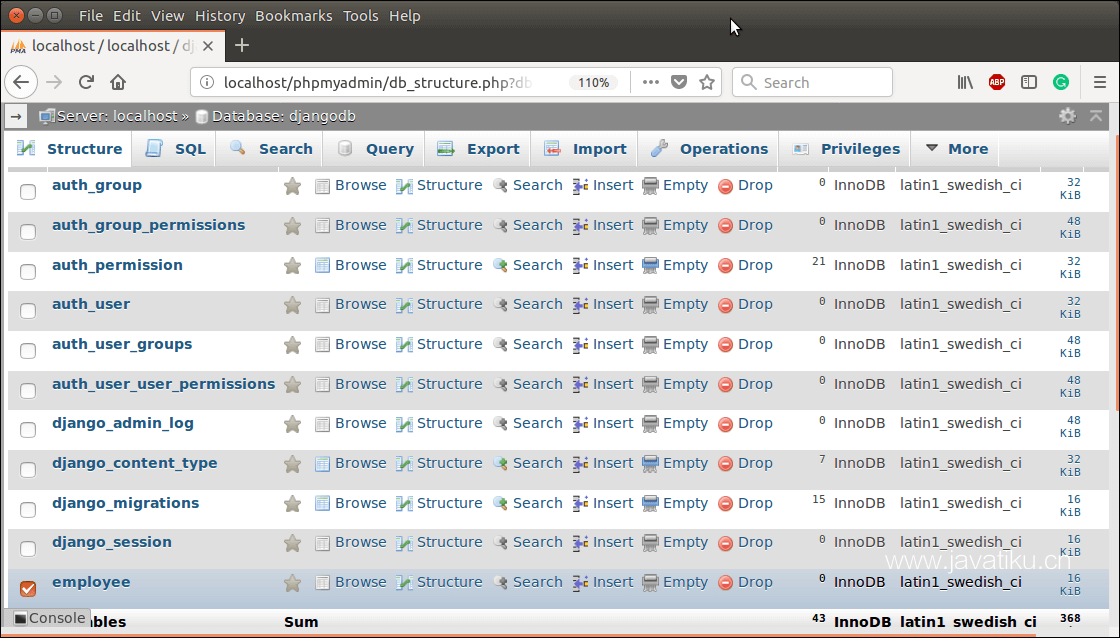
现在,我们的应用程序已成功连接并在数据库中创建了表。它创建 10 个用于处理项目(会话、身份验证等)的默认表以及我们创建的模型的一张表。
请参阅迁移命令后创建的表列表。
运行服务器
要运行服务器,请使用以下命令。
$ python3 manage.py runserver 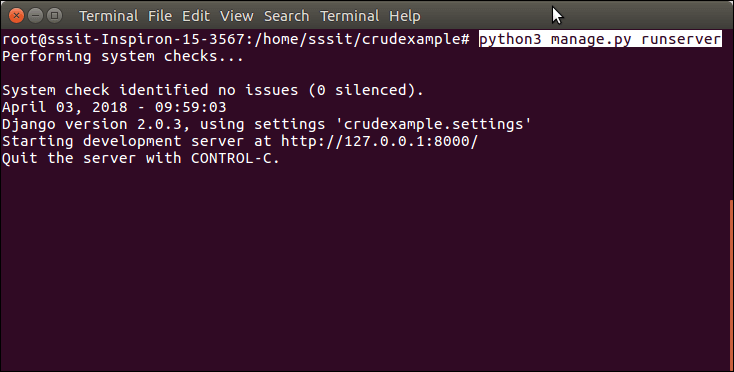
访问浏览器
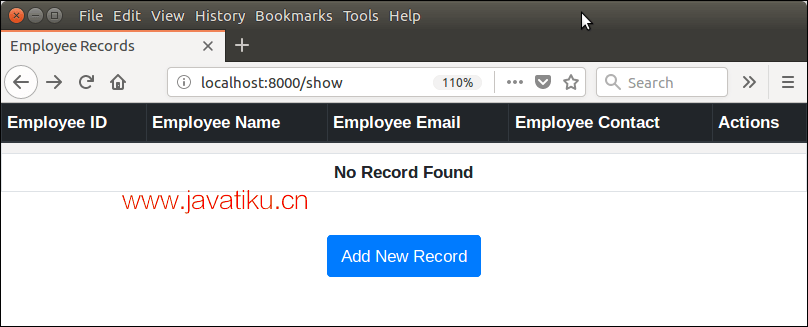
输入localhost:8000/show访问该应用程序,它将显示所有可用的员工记录。
最初,没有记录。所以,它显示没有记录消息。
添加记录
单击添加新记录按钮并填写详细信息。请参阅示例。
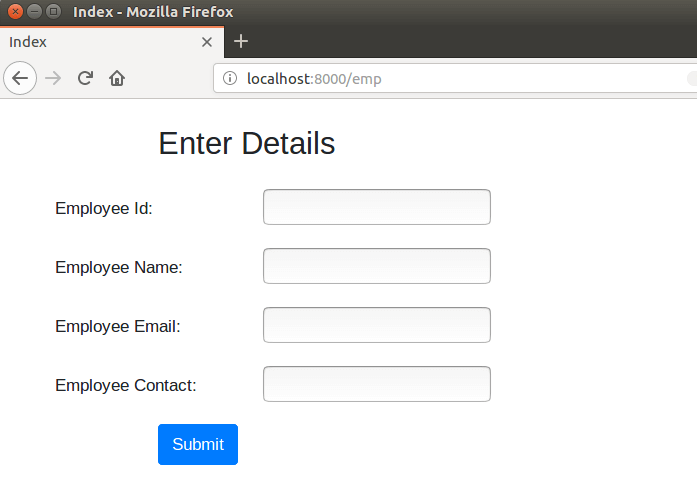
填写详细信息。
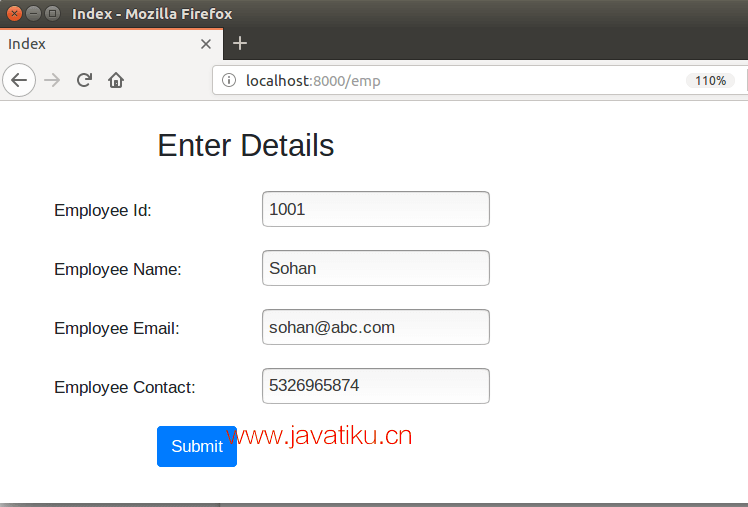
提交记录看看,提交后显示已保存的记录。
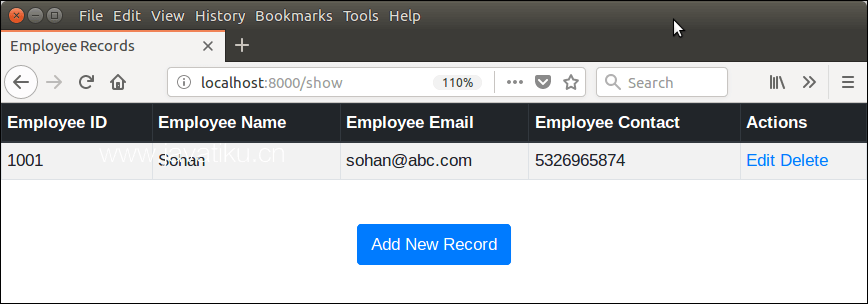
此部分还允许更新和删除操作列中的记录。
保存几条记录后,现在我们有以下记录。
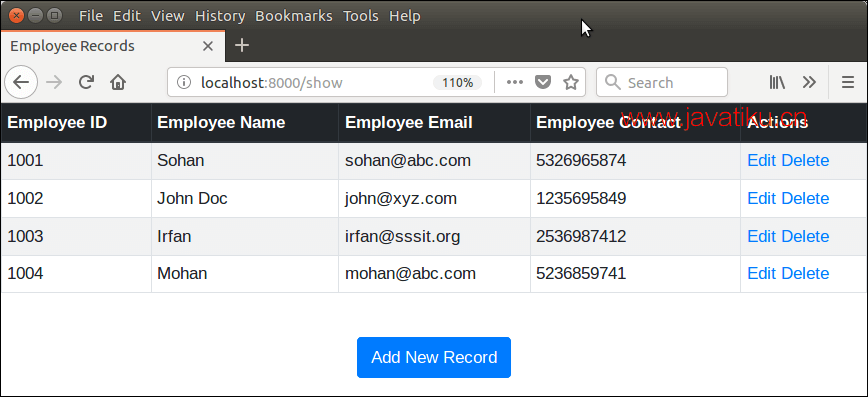
更新记录
让我们通过单击编辑按钮来更新Mohan的记录。编辑模式下会显示Mohan的记录。
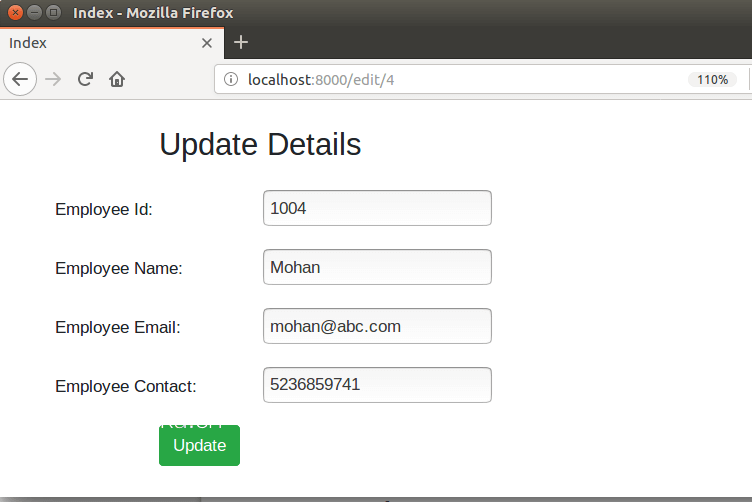
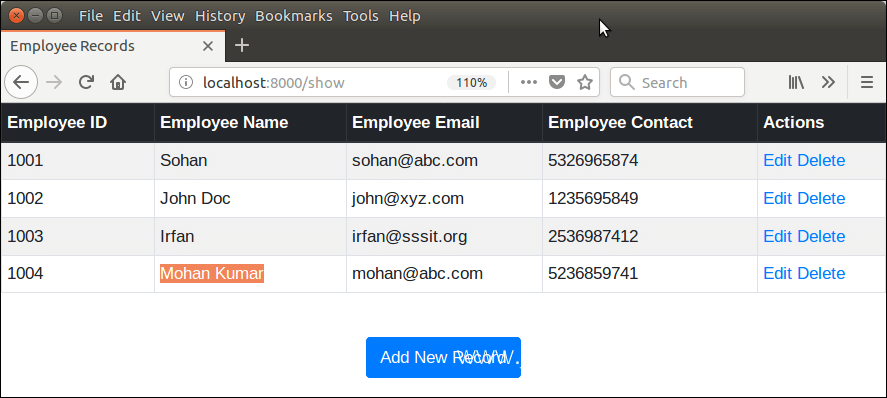
让我们假设我将mohan更新为mohan kumar,然后单击更新按钮。它立即更新记录。请参阅示例。
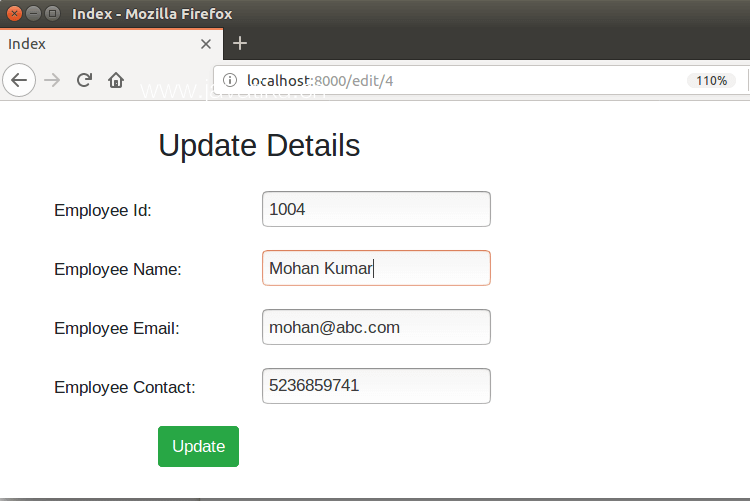
单击更新按钮,它会重定向到以下页面。查看名称已更新。
同样,我们也可以通过单击删除链接来删除记录。
删除记录
假设,我想删除Sohan,只需单击删除按钮即可轻松完成。请参阅示例。
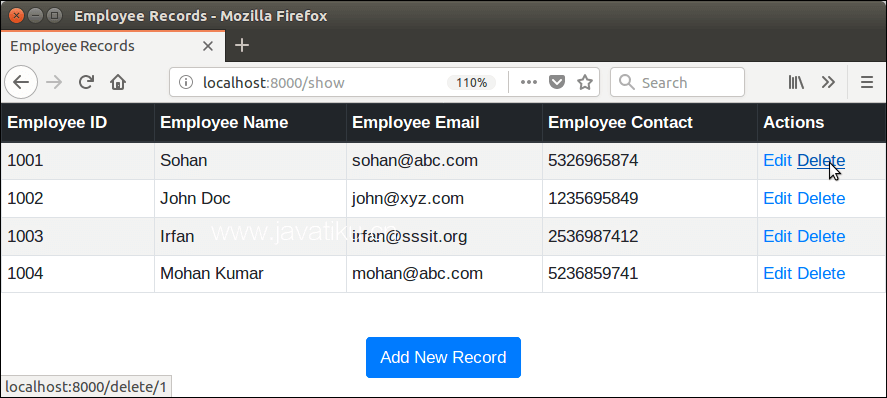
删除后,我们留下了以下记录。
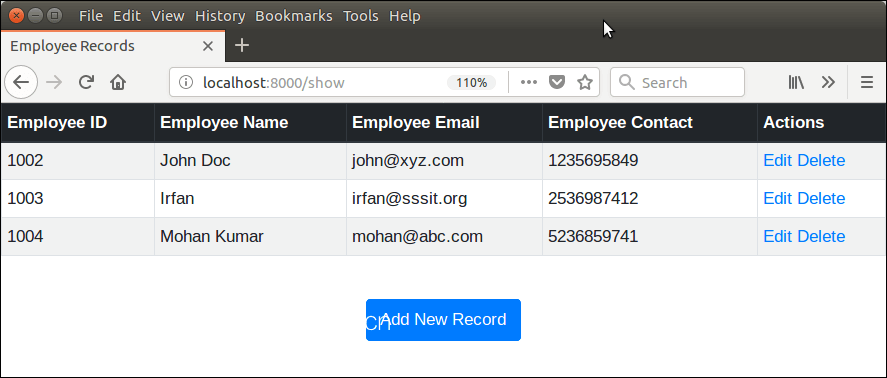
好了,我们已经使用 Django 成功创建了一个 CRUD 应用程序。


